23 Beautiful Braided Cornrow Styles for Black Women That Stay Flawless

Cornrows are real architecture, each row is a decision about weight, direction, and how long your scalp can hold it. Done right, they’re some of the lowest-maintenance protective styles out there. Done with too much tension, they’re the fastest way to a receding hairline.
Studio photos never show the bumps at week two, the pulling at your temples, or the frizz creeping in by day four. What actually matters is what a style looks like on a real Tuesday morning, not hour one.
The best cornrows balance both, real design and a scalp that isn’t screaming. Here are 23 that do.
Quick-Match Guide
| Style Category | Best Face Shape | Typical Lifespan | Scalp Tension Risk | Morning Routine |
|---|---|---|---|---|
| Clean & Classic Feed-Ins | Oval, round | 4 to 6 weeks | Low | 3 min |
| Stitch Braids & Precision | Square, oval | 4 to 6 weeks | Medium | 3 min |
| Tribal, Fulani & Bohemian | Any | 5 to 7 weeks | Medium | 5 min |
| High-Impact Updos | Round, heart | 3 to 5 weeks | Medium to high | 5 min |
| Natural & Short/Edgy | Any | 2 to 4 weeks | Low | 4 min |
Category A: Clean & Classic Feed-Ins
Everyday elegance
1. 6 to 8 Classic Straight-Back Feed-Ins
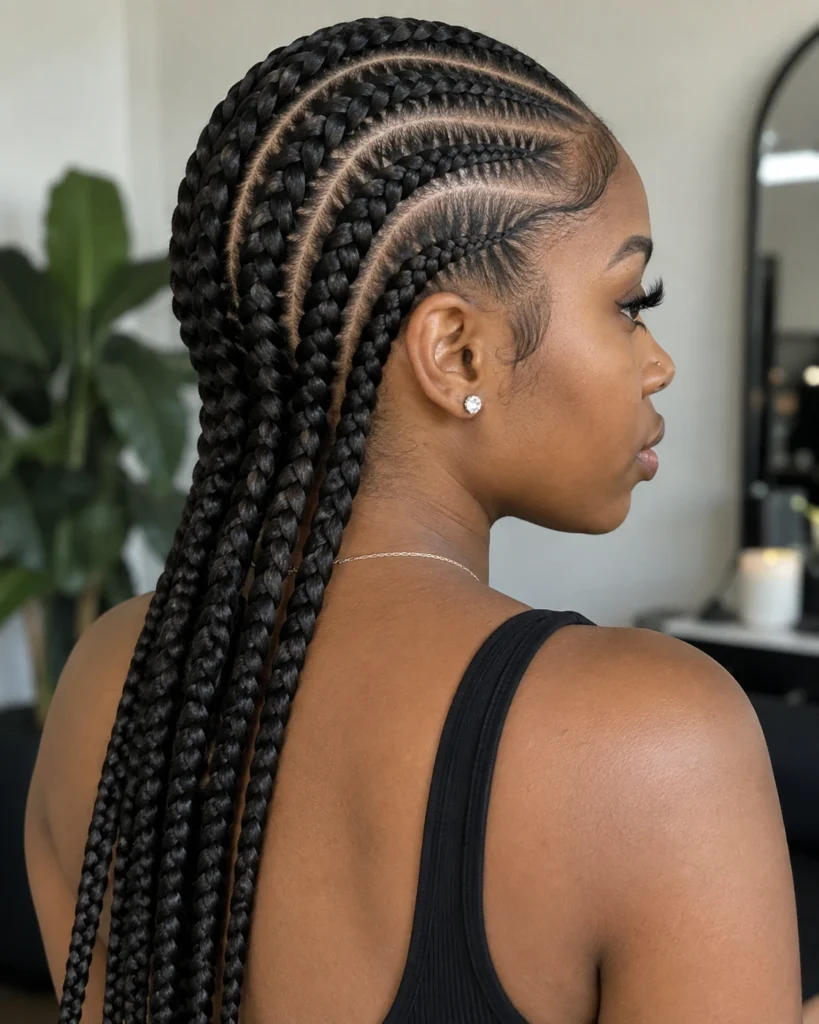
Six to eight rows, no more, running straight from front to nape, feed-in method blending your natural hair with Kanekalon extensions so the base never looks bulky. Fewer, wider rows put less overall tension on the scalp than a dozen skinny ones would, which matters if this is a style you wear often.
Ask for a tension-free grip at the very start of each row, right at the hairline, the first inch is where most of the pulling actually happens over the following weeks.
- Best Suited For: Oval and round face shapes, medium to thick density, everyday low-fuss wear
2. Center-Part Symmetrical Straight-Backs
A precise center part splits the head into two mirrored halves, each with identical rows running straight back, a clean, almost architectural look that depends entirely on that part staying razor-sharp. It reads as put-together without any beads, curves, or extras doing the work.
Have the part re-checked with a rat-tail comb before the first row goes in on each side, an off-center start throws off the whole symmetry by the time you reach the nape.
- Best Suited For: Oval and heart face shapes, any density, office or formal settings
3. Subtle Curved Feed-In Rows
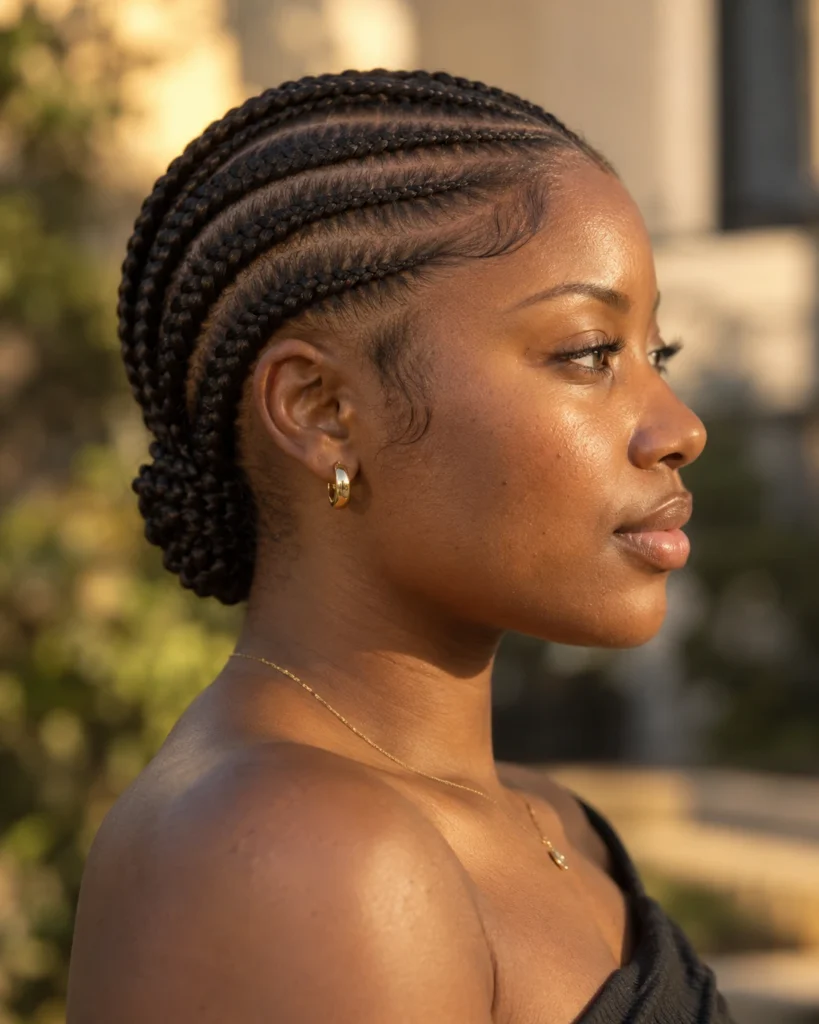
Instead of straight lines, the rows curve gently following the shape of your head, a softer effect than straight-backs without going full lemonade-braid drama. The curve does real face-framing work, especially around the temples where it naturally follows your hairline.
Ask your braider to mark the curve with clips before braiding starts, adjusting a curve mid-braid creates visible inconsistency row to row.
- Best Suited For: Square and diamond face shapes, medium density, versatile for work or casual wear
4. Micro Straight-Backs with Dipped Feathered Ends
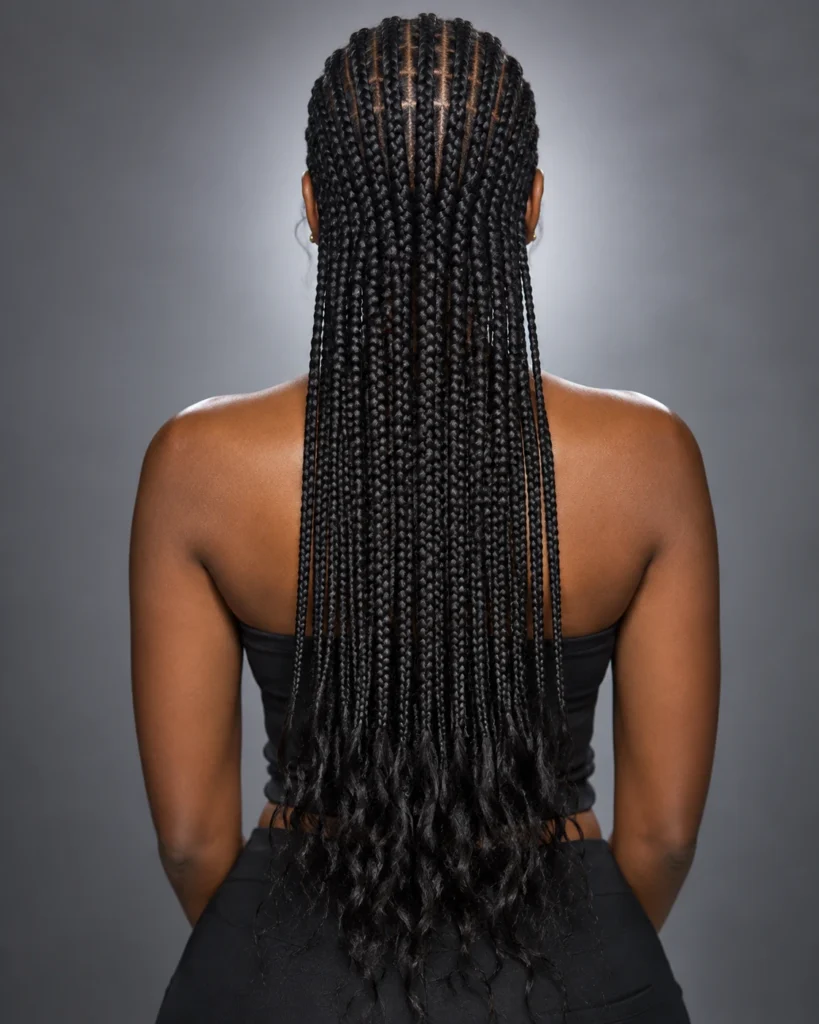
Very thin, tightly braided rows meet loose, feathered ends dipped briefly in hot water to set a soft curl, giving structure at the root and movement at the tips. The contrast between tight and loose is the whole point here.
Confirm the hot-water dip stays under 10 seconds per section, longer dipping on Kanekalon can make the ends feel stiff and plasticky instead of soft.
- Best Suited For: Any face shape, fine to medium density, longer hair for the feathered ends to show
5. Minimalist 4-Row Chunky Feed-Ins
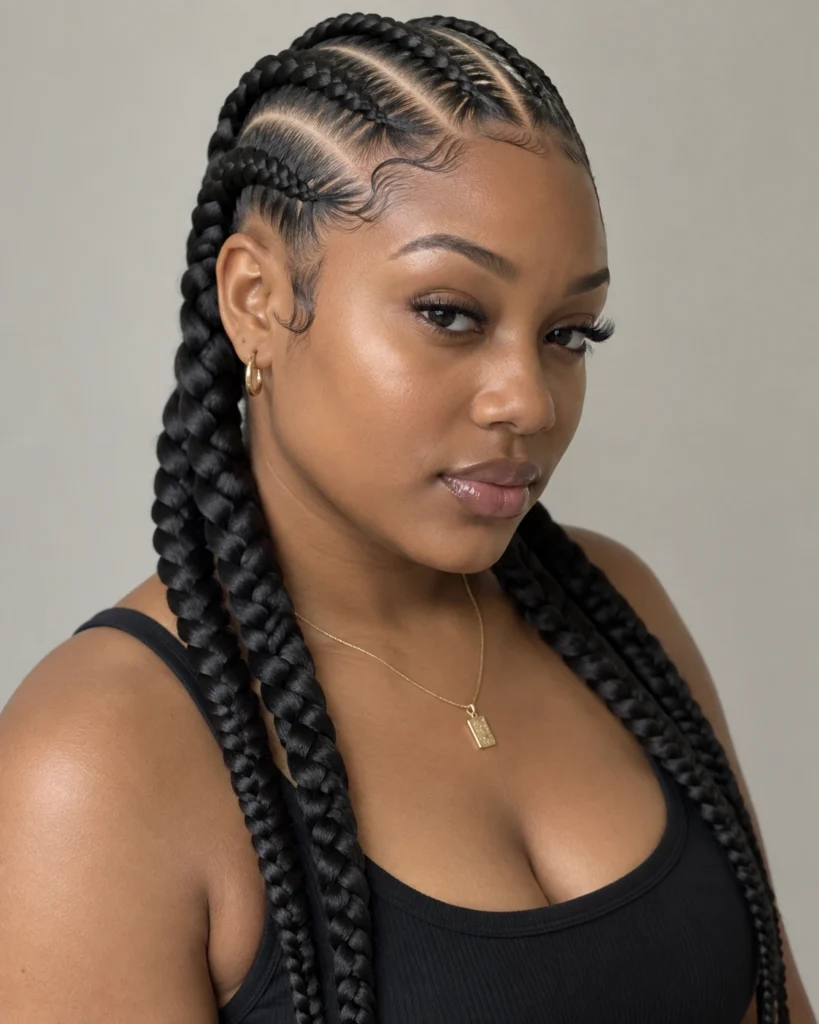
Just four wide rows cover the whole head, the lowest-tension option in this entire category since there are so few parts pulling at the scalp. It’s a bold, graphic look precisely because there’s nowhere for the eye to get lost in detail.
Ask for slightly looser braiding through the mid-lengths specifically, four chunky rows carry more weight per row than thinner ones, and that weight needs somewhere to give.
- Best Suited For: Any face shape, thick density preferred, first-time braid wearers
Category B: Stitch Braids & Architectural Precision
Precise lines, real skill required
6. Precision Thin-Line Stitch Braids
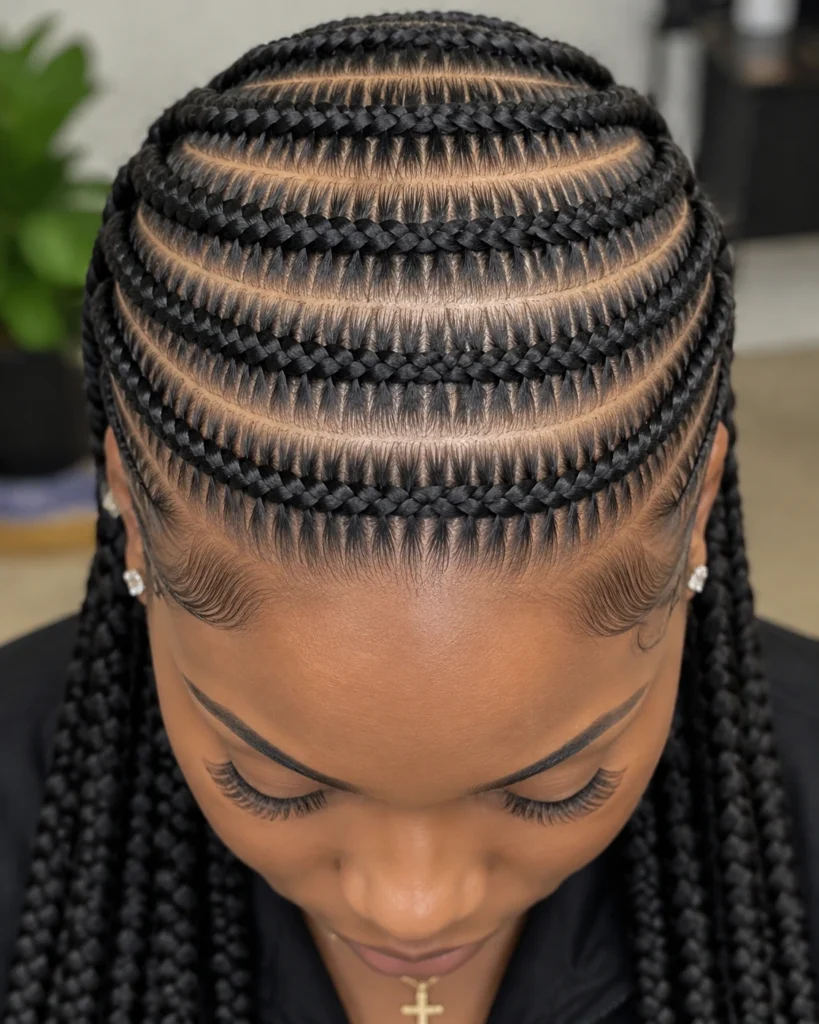
Stitch braiding uses a visible, defined line down the center of each row rather than a flat cornrow surface, creating a raised, almost sculptural texture. It takes a genuinely skilled hand, an uneven stitch line reads as sloppy rather than intentional.
Ask to see a sample row before the full install, stitch technique varies a lot between braiders, and you want to confirm the look before hours are invested.
- Best Suited For: Any face shape, medium to thick density, special occasions or extended wear
7. Curved S-Pattern Stitch Cornrows
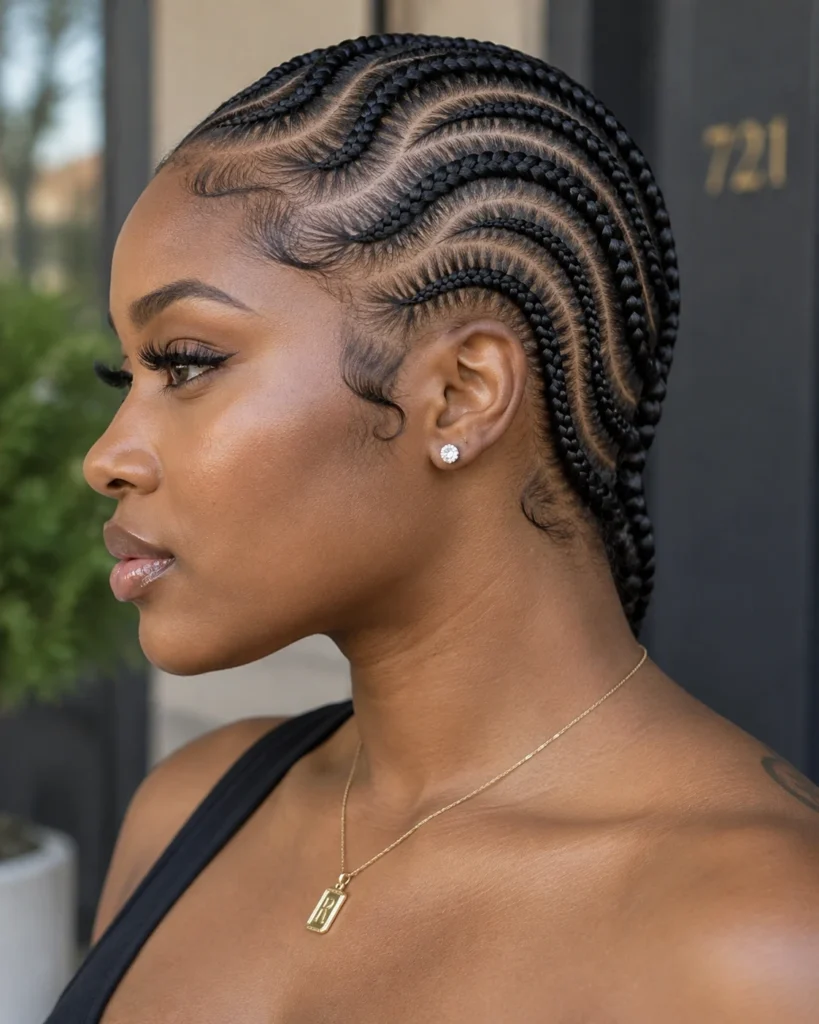
The stitch technique follows a flowing S-curve from the crown down, combining the raised texture of stitch braiding with the movement of a curved part. It’s one of the more advanced patterns on this list, worth confirming your braider has done this specific shape before.
Have the S-curve mapped out with a comb line before any braiding starts, this pattern is nearly impossible to correct mid-install without redoing multiple rows.
- Best Suited For: Oval and round face shapes, medium density, statement styling
8. Zig-Zag Parted Modern Stitch Braids
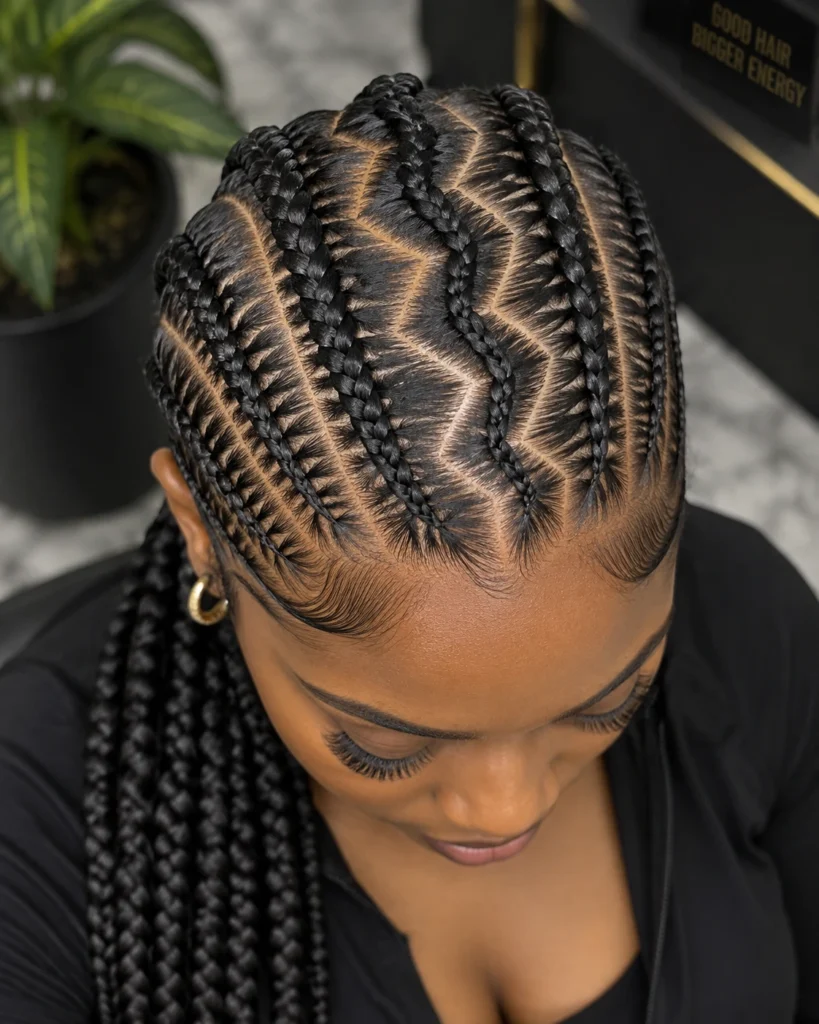
Sharp zig-zag parts break up the usual straight or curved rows into a bold, graphic pattern, each angle a deliberate design choice rather than a softened curve. The geometry stays crisp for the first two weeks, then softens slightly as new growth comes in.
Ask for the zig-zag angles to stay wide rather than tight, narrow zig-zags trap more scalp tension at each turn than wider ones do.
- Best Suited For: Square and oval face shapes, any density, bold everyday styling
9. Criss-Cross Geometric Stitch Rows
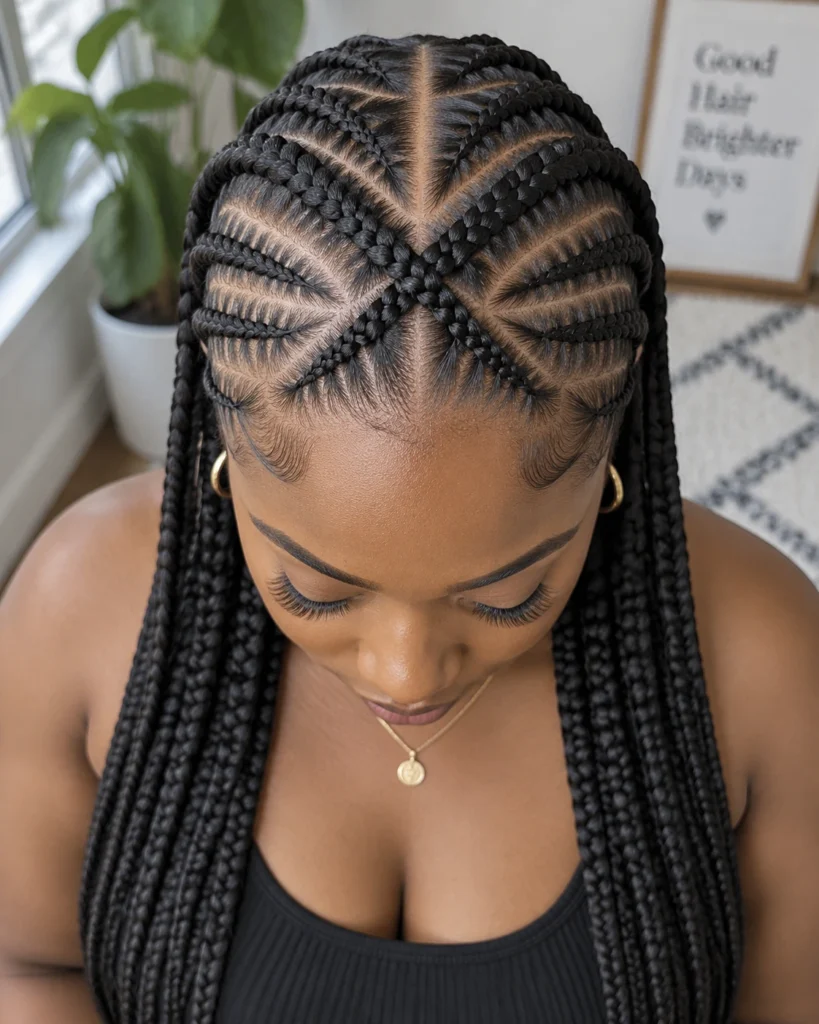
Rows cross over each other at deliberate points rather than running in one direction, creating a woven, basket-like pattern across the scalp. This is one of the longer install times in this whole roundup, the crossing points take real planning.
Confirm the crossing points are braided, not just laid over each other with a pin, pinned crossings loosen fast and don’t survive more than a few days.
- Best Suited For: Any face shape, medium to thick density, worth the longer chair time for events
10. Thick-and-Thin Alternating Stitch Pattern
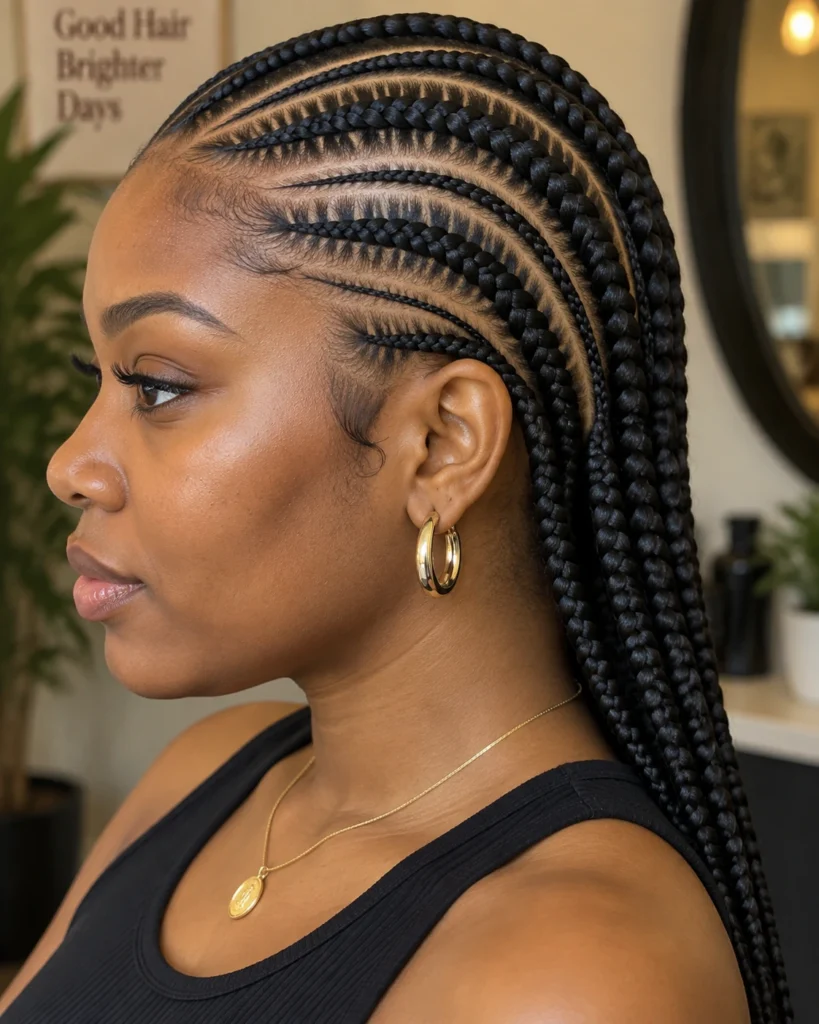
Alternating wide and narrow rows across the head creates rhythm and visual interest without needing curves or color, just the pattern itself. The thick rows carry more length comfortably, while the thin ones add detail between them.
Ask for the thick rows to be braided first, working the thin rows in around them is easier than fitting wide rows into an already-set thin pattern.
- Best Suited For: Round and oval face shapes, medium to thick density, everyday statement wear
Category C: Tribal, Fulani & Bohemian Textures
Cultural roots, real craftsmanship
11. Traditional Center-Part Fulani Braids with Beads
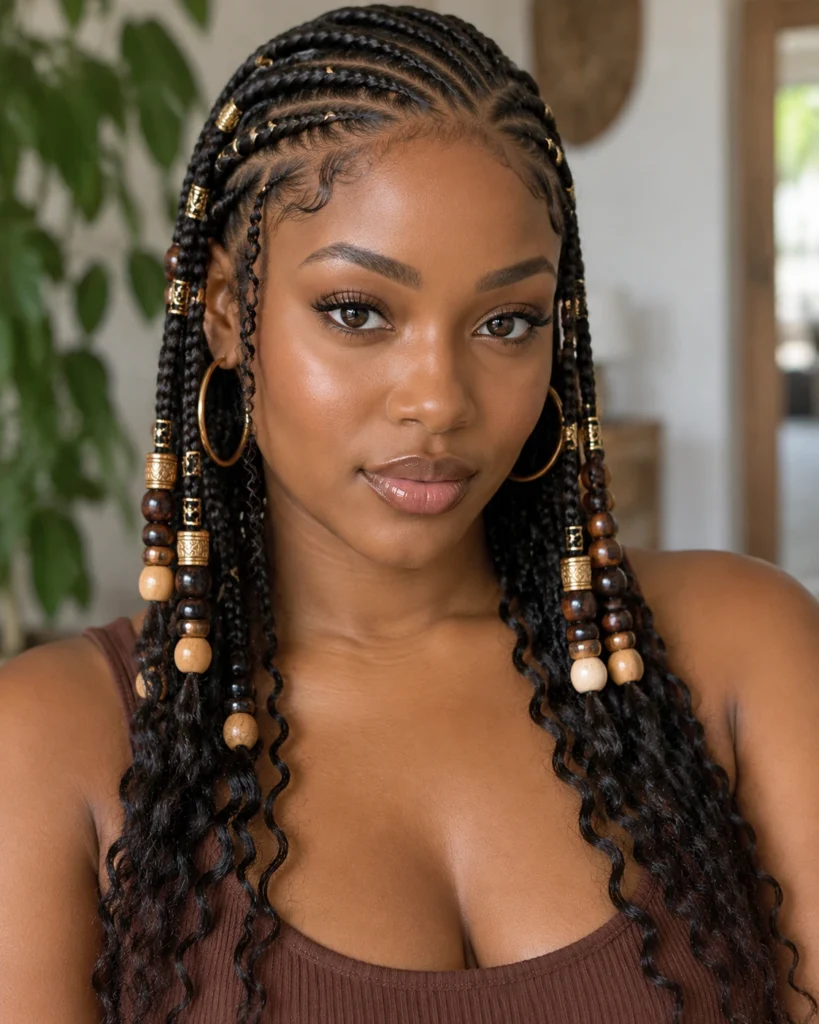
Cornrows run along the front from a center part while individual braids take over toward the back, finished with beads or cuffs placed with real intention rather than scattered randomly, similar to the Fulani placement in our braid and weave styling guide. The combination gives you the low-tension scalp coverage of cornrows without braiding the entire head.
Ask for beads placed only on every third or fourth braid rather than all of them, that spacing keeps the weight manageable and shows off each bead better.
- Best Suited For: Any face shape, medium density, cultural and everyday wear alike
12. Goddess Cornrows with Loose Deep-Wave Tendrils
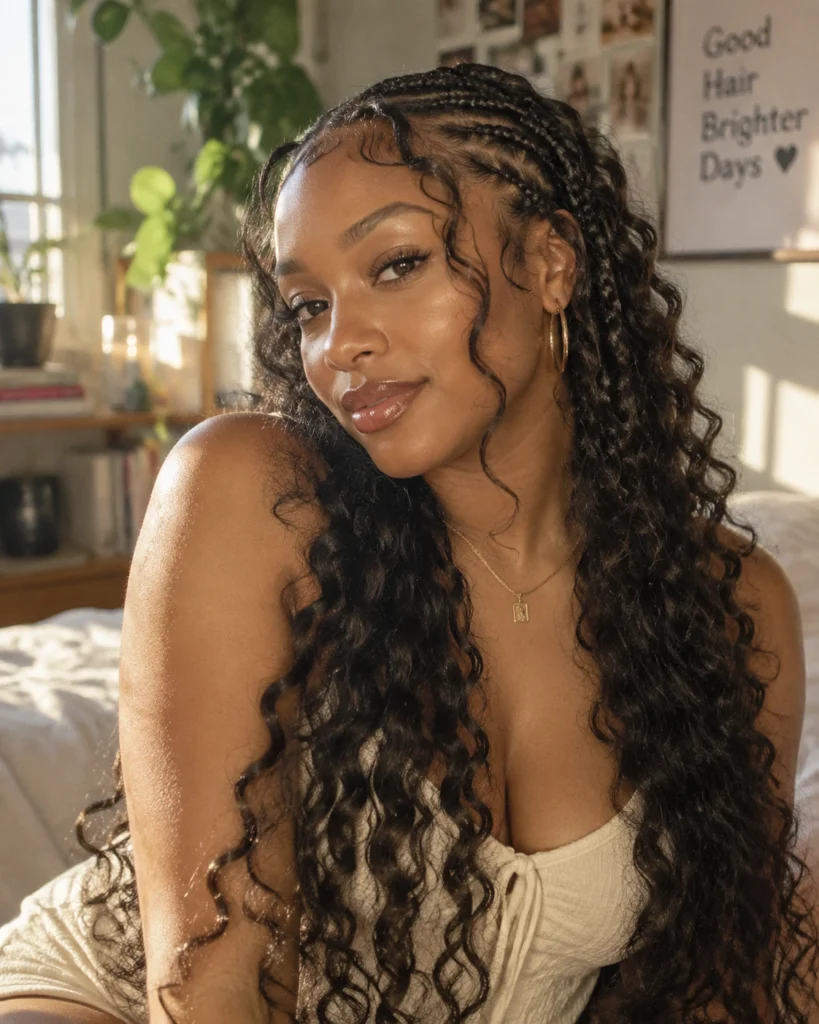
Thick, raised cornrows sit at the front and crown while deep-wave curly extensions hang loose everywhere else, a combination that reads as both structured and soft at once. The goddess style specifically uses larger, more voluminous rows than a standard cornrow.
Have the cornrow sections stop before they reach the ear, letting the loose curls start there instead, cornrows that wrap too far around can pull uncomfortably at the temple.
- Best Suited For: Round and oval face shapes, any density, special occasions and vacations
13. Deep Side-Swept Lemonade Cornrows
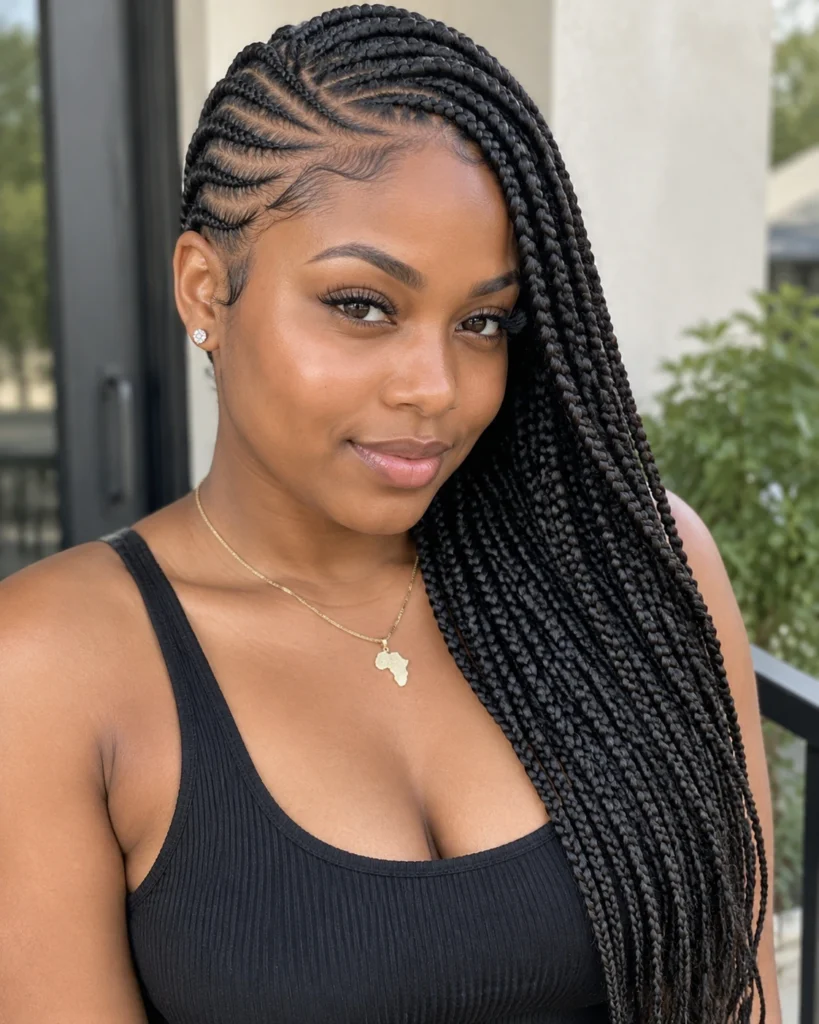
Every row sweeps dramatically to one side from a deep side part, the signature lemonade look that’s become one of the most recognized cornrow styles in the last decade. The deep part itself adds real asymmetry to the face, not just the braids.
Ask your braider to start the part deeper than feels comfortable at first, a part that looks dramatic while dry often relaxes into something more subtle once the braids settle in.
- Best Suited For: Square and diamond face shapes, any density, bold statement wear
14. Layered Two-Tier Tribal Feed-Ins
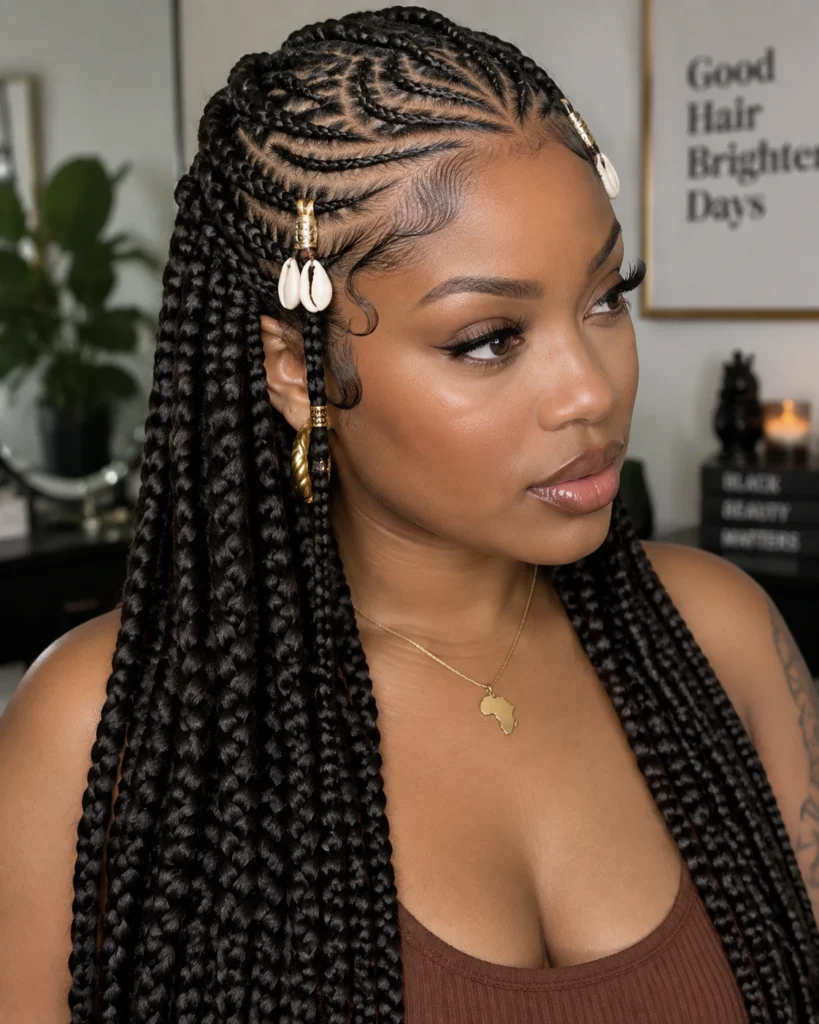
Two distinct layers of braids, a shorter set at the crown and a longer set beneath, create real dimension instead of one flat plane of rows. It’s a more advanced sectioning technique, the two tiers need to be mapped out before any braiding starts.
Confirm the top tier is sectioned and clipped away completely before the bottom tier begins, braiding both tiers simultaneously is how uneven layers happen.
- Best Suited For: Round and oval face shapes, thick density for the layered volume, statement occasions
15. Bohemian Feed-Ins with Cowrie Shell Accents
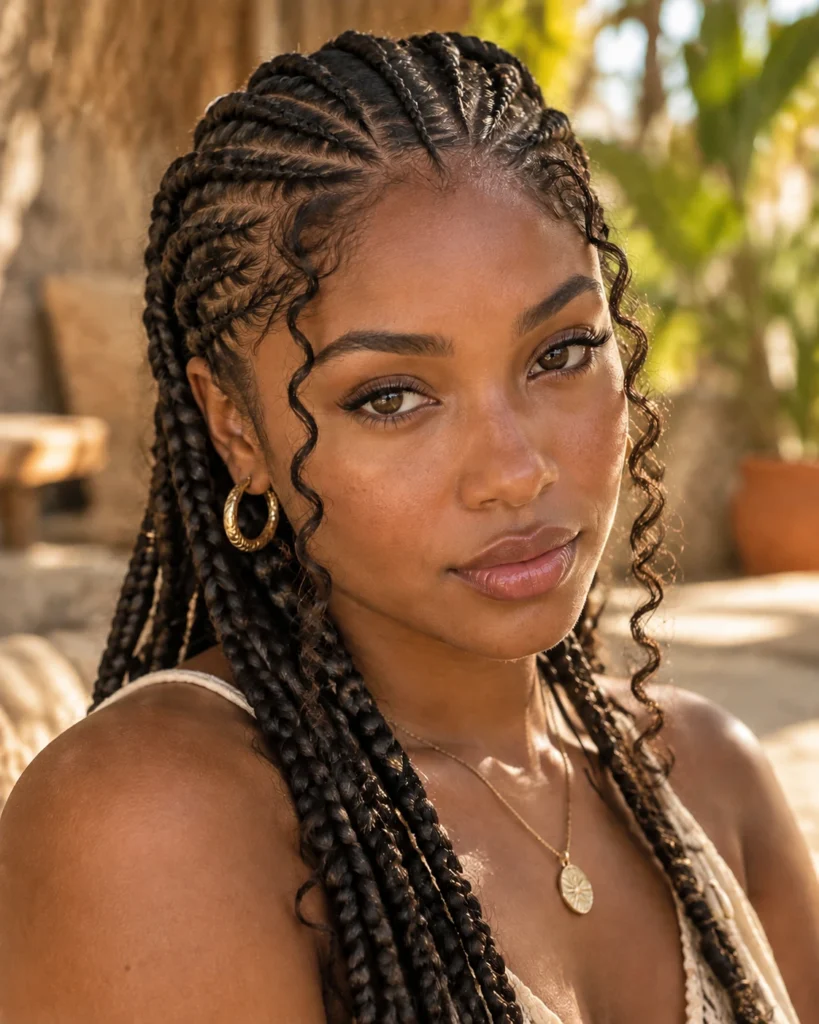
Loose, wavy feed-in braids get finished with cowrie shells clipped or threaded onto select strands, a nod to traditional African hair adornment that’s become a genuine style statement in its own right, similar to the shell and bead placement in our box braids styling guide. The shells add real weight, so placement matters.
Ask for shells placed toward the ends of braids rather than near the root, shells near the scalp add noticeable pulling weight exactly where you don’t want it.
- Best Suited For: Any face shape, medium to thick density, cultural celebration and everyday wear
Category D: High-Impact Updos & Statement Sets
Structure with real occasion presence
16. Sleek Sky-High Braided Ponytail Cornrows
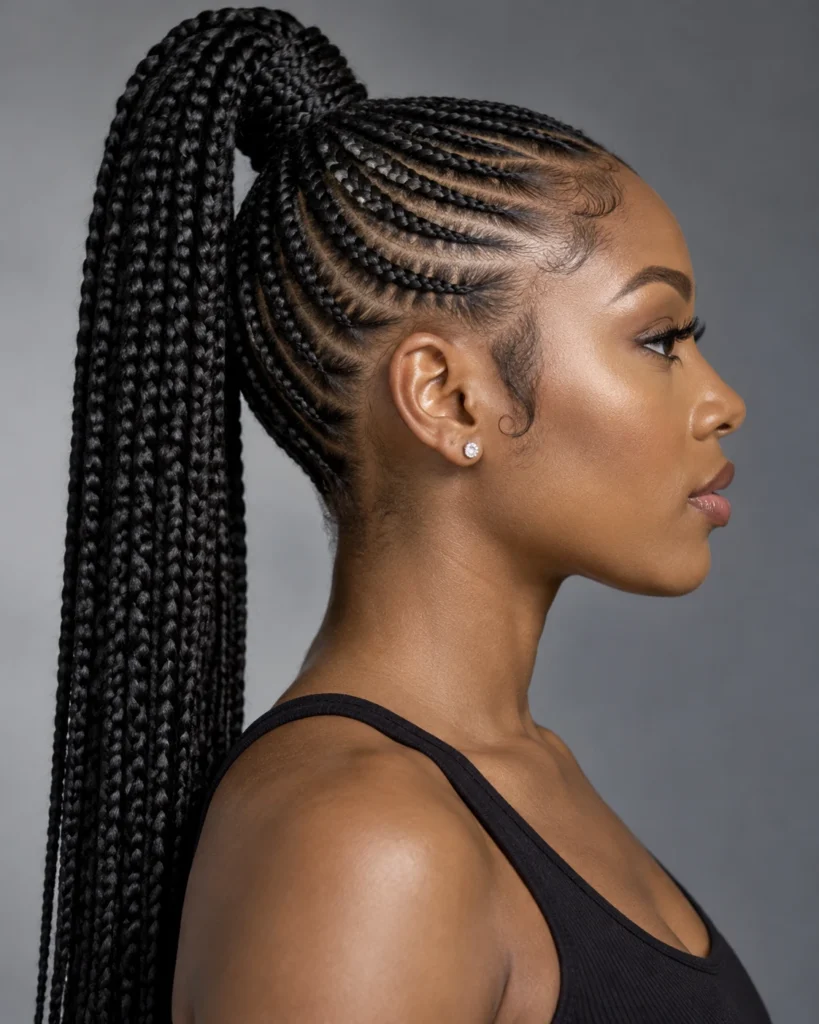
Cornrows gather into one high, sleek ponytail at the crown, a genuinely dramatic silhouette that puts real focus on your face and neckline. The height itself creates tension at the crown specifically, worth discussing with your braider before you commit to this one long-term.
Ask for the gathering point secured with a soft, fabric-covered band rather than a bare rubber band, rubber bands snag and pull in a way fabric-covered ties don’t.
- Best Suited For: Oval and heart face shapes, any density, formal events and photo-ready occasions
17. Low Nape Braided Bun with Feed-In Base
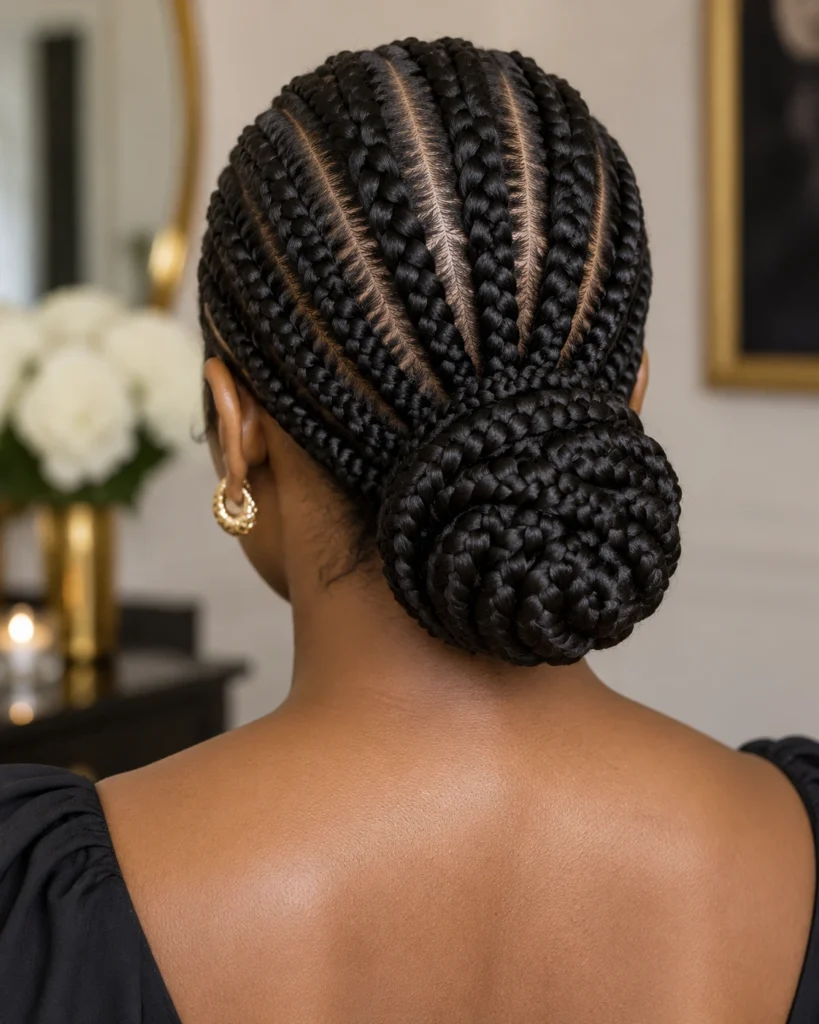
Cornrows feed into one low bun sitting right at the nape, a quiet, polished shape that puts almost no tension on the crown or temples since the pull happens low and close to the head. It’s one of the most comfortable updo options in this whole category.
Have the bun coiled rather than just gathered and wrapped, a coiled bun distributes its own weight more evenly than a simple wrap does.
- Best Suited For: Any face shape, any density, workplace-appropriate everyday wear
18. Half-Up, Half-Down Cornrow & Knotless Combo
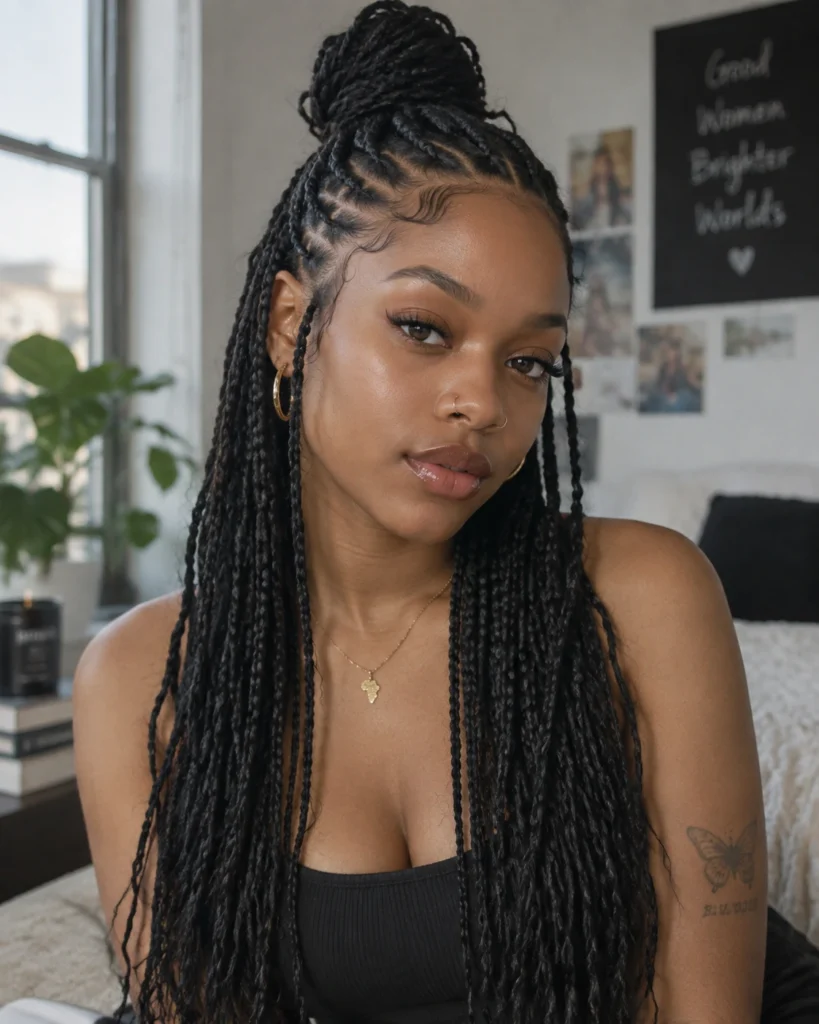
The crown section braids into cornrows while the rest hangs as loose knotless braids, giving you the structure of cornrows up top with the movement of knotless braids everywhere else. It’s genuinely two techniques in one install, worth extra chair time.
Ask for the transition point between cornrows and knotless braids to sit slightly behind your ear, not directly at it, that hides the technique change better.
- Best Suited For: Round and oval face shapes, any density, versatile day-to-night styling
19. Crown Halo Wrap Cornrow
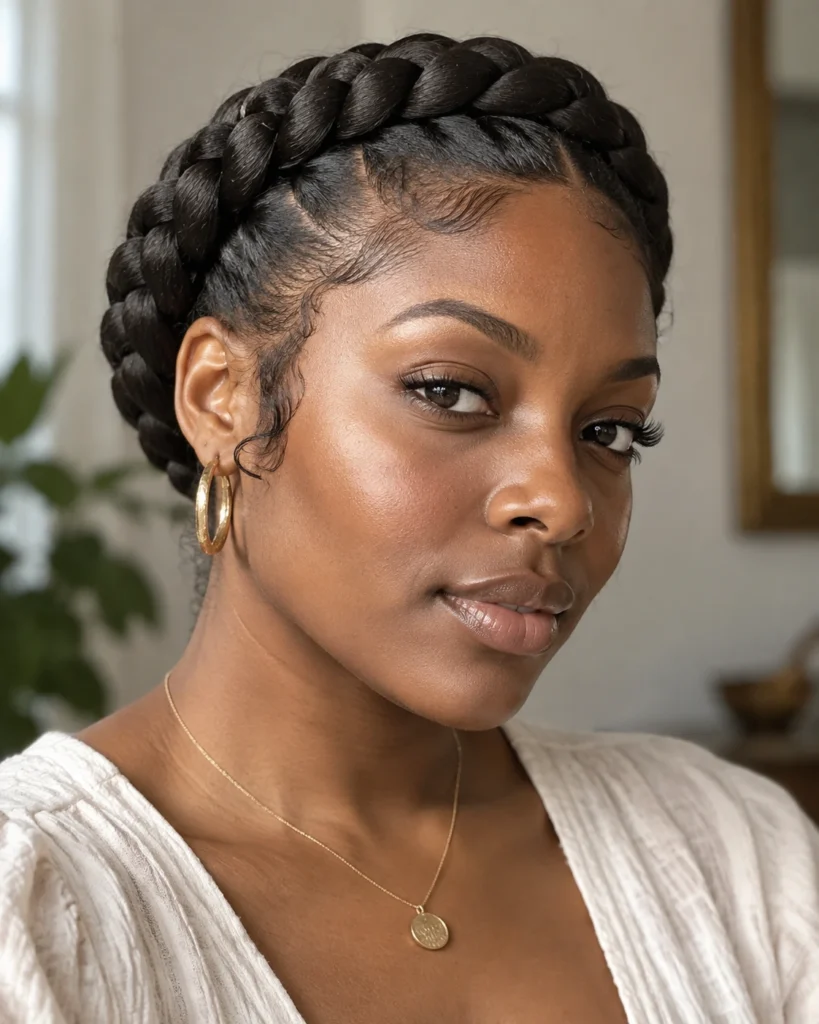
A single continuous cornrow wraps around the entire head like a halo, with the rest of your hair, natural or extensions, gathered and hidden beneath it. It’s a clever, low-bulk way to get an updo look without a heavy bun sitting on top.
Have the halo braid secured with small, hidden pins rather than relying on braid tension alone, tension-only halos tend to loosen and droop by the second day.
- Best Suited For: Any face shape, medium to thick density, elegant everyday and formal wear
20. Elevated High Bun with Hanging Side Braids
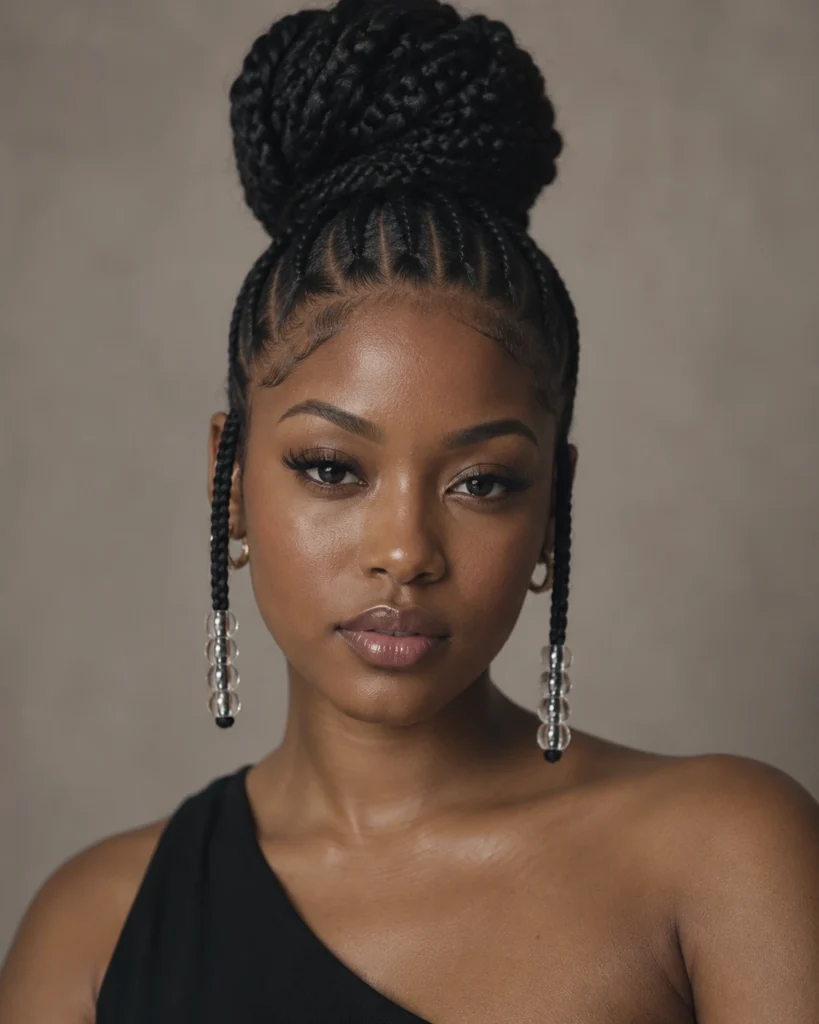
Most of the hair gathers into one high, structured bun while a couple of thin braids are left loose to hang along the sides, a detail that softens what could otherwise be a very severe, fully pulled-back look. The hanging braids do real face-framing work.
Leave the side braids slightly looser than the rest of the install, tightly braided face-framing pieces don’t move the way soft ones do.
- Best Suited For: Square and oval face shapes, any density, dressy everyday wear
Category E: Natural Hair & Short/Edgy Accents
For the lowest tension and the boldest lines
21. All-Natural Hair Cornrows (No Extensions, Zero Tension)
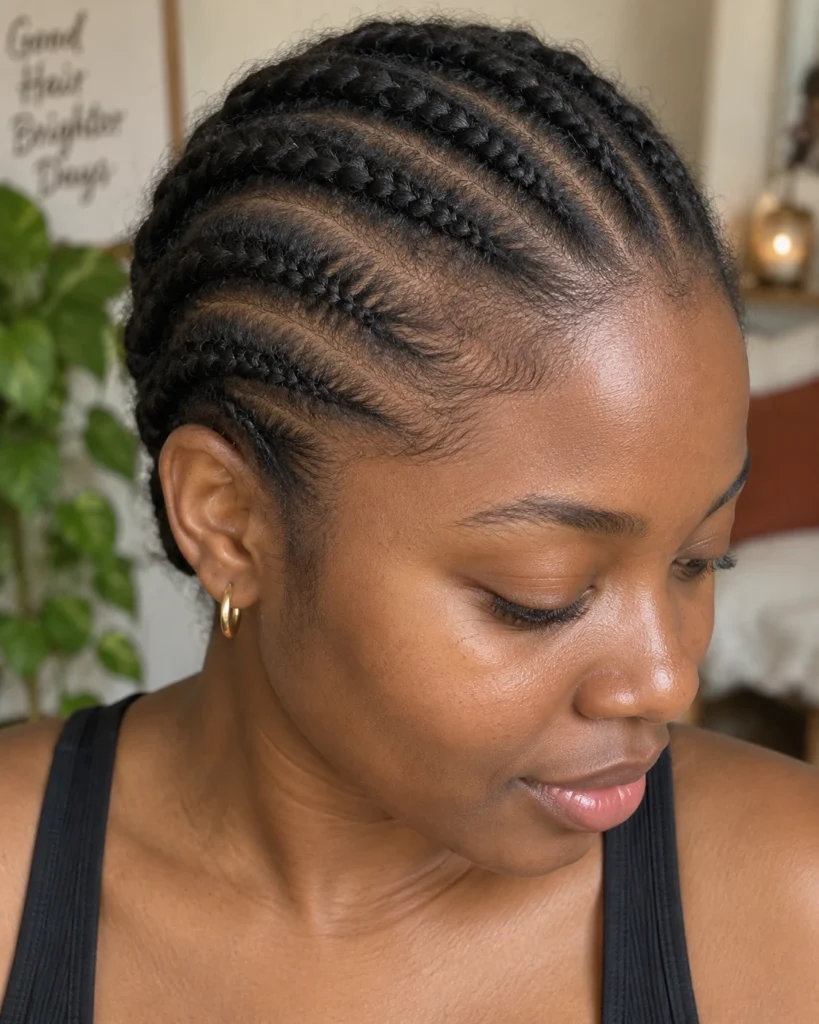
Using only your own hair with zero added extensions, this cornrow style carries none of the extra weight that Kanekalon adds, which makes it the lowest-tension option on this entire list by a wide margin. It wears shorter than an extension install, but it’s genuinely the gentlest choice for a scalp that needs a break.
Ask specifically for a looser grip than your braider’s default, a lot of braiders tighten instinctively for extension installs, and that same tension isn’t necessary without the added weight.
- Best Suited For: Any face shape, any density, scalps recovering from tighter styles
22. Tapered Fade Crown Cornrows
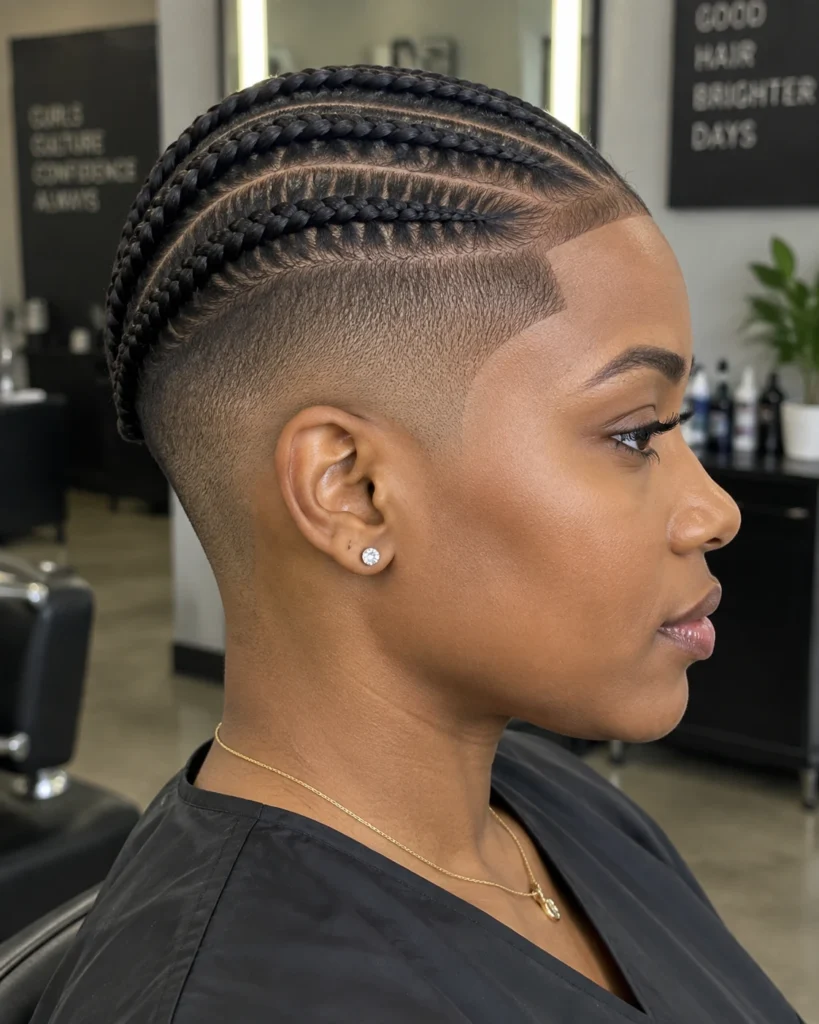
Cornrows cover only the crown and top of the head while the perimeter fades close with clippers, combining two textures and two techniques into one edgy, modern shape. The fade needs regular upkeep independent of the braids themselves.
Book the fade touch-up separately from your braid schedule, fades grow out roughly twice as fast as cornrows need re-braiding, waiting for both leaves the fade looking grown-out for weeks.
- Best Suited For: Round and oval face shapes, any density, bold, low-maintenance styling
23. Short Bob-Length Cornrows with Curled Ends
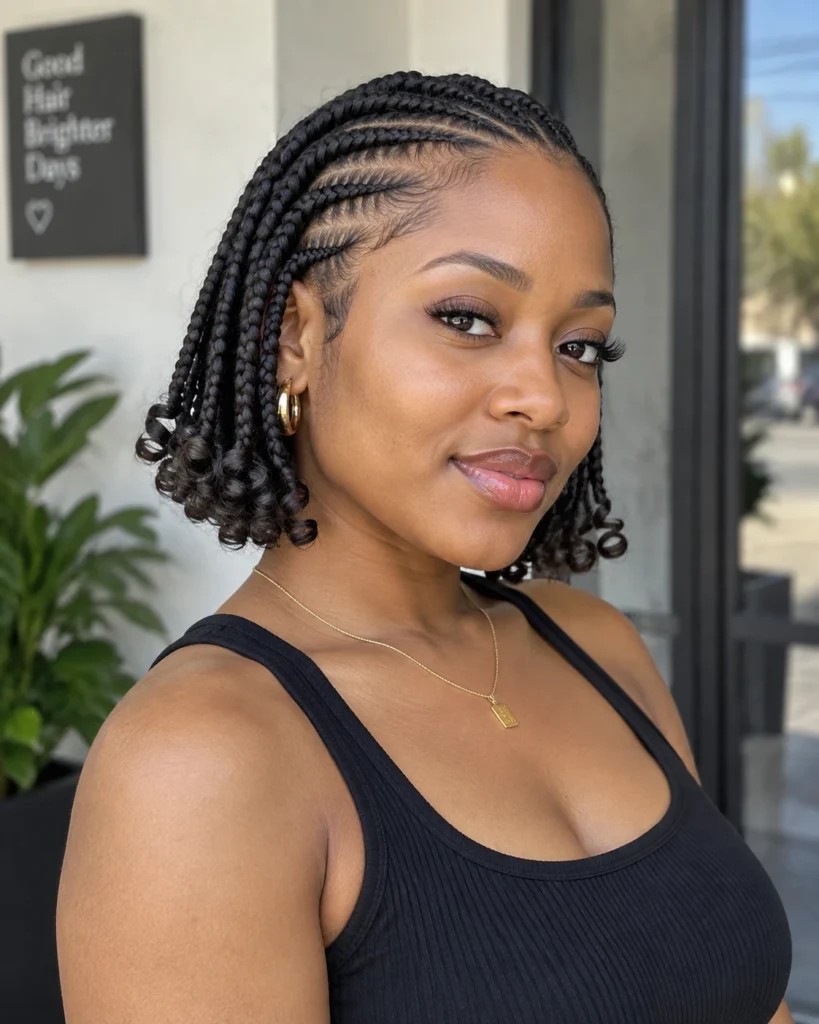
Cornrows cut and finished at bob length with the ends curled rather than left straight give the style real movement despite the short length. It’s a genuinely underrated option for anyone who wants the protective benefits of cornrows without committing to long hanging braids.
Ask for the ends curled with perm rods after the braiding is complete, not curled extensions pre-attached, freshly curled ends hold their shape longer and look more natural.
- Best Suited For: Any face shape, any density, short-hair protective styling
The Braider Consultation Script
Read this close to word for word before the braider picks up a single section.
“I want tension-free parting, especially at my hairline and temples, please stop and check in with me if anything feels tight while you’re braiding, not after. Feed the extension hair in gradually rather than all at once at the base, I’d rather the braid build up gradually than start bulky. Keep the rubber bands off my actual hairline if we’re using any, and let’s do a scalp check halfway through so we can adjust before you’re too far in to fix it easily.”
Real-World Nighttime Wrap & Scalp Survival Protocol
A light foaming mousse worked over the front rows before bed, then wrapped flat against the head with a silk scarf, takes about ten minutes and keeps flyaways down without adding product buildup. Skip the wrap more than a night or two, and you’ll see it in loosened edges by the end of the week.
Use a nozzle-tip applicator bottle filled with a lightweight oil, jojoba or peppermint rather than heavy petroleum-based greases, and apply directly to the visible scalp between rows, not over the braids themselves. Heavy grease sits on top and clogs pores instead of actually reaching the skin that needs it, the same reason a lighter scalp treatment works better for buildup than a heavy product does.
A long, oversized satin bonnet or a silk scarf wrapped fully around the hairline protects both the ends of your braids and the fragile edges at your temples from overnight friction. Cotton pillowcases and bare cotton bonnets pull moisture out of both, satin and silk don’t.
A cornrow that looks incredible for one photo and a cornrow you can actually live in for six weeks aren’t always the same install. Prioritize the one your scalp can handle, the design will still be there either way.