13 Modern Hime Cut Without Bangs Ideas: The Forehead-Free Architectural Statement

Hime cut without bangs is the version of this look I get asked for most, usually from someone who loves the sharp, doll-like geometry online but does not want a thick forehead fringe cutting their face in half.
In years of cutting precision bobs and structural lines in the chair, the forehead fringe is almost always the real hesitation, not the sidelocks themselves, and dropping it entirely solves that without losing the architecture everyone actually wants.
Without a fringe, the visual anchor moves onto the cheek steps instead, which elongates the jawline rather than boxing in the forehead the way the full version can. If you still want that fringe, our bob with bangs guide covers that route instead.
It also means real daily flexibility, since a forehead-free sidelock can part center or off-center and tuck away completely on a day you need it out of your face. Here are thirteen ways to wear it.
The Architecture of a Hime Cut Without Bangs
This shape has been called one of the biggest haircut trends to watch right now, and the fringe-free version is the one actually translating to everyday wear instead of staying on a red carpet.
- The Lip vs Jawline Index: dropping the sidelock shelf from lip level down to the jaw angle shifts the visual weight from widening the cheekbones to sharpening the jaw instead.
- The Stealth Tuck Protocol: cutting the cheek panel on a slightly diagonal sub-section lets it pin flat against the skull or tuck behind the ear for a completely conventional look whenever you need one.
- The Density Dilemma: carving too much hair out of the front hairline turns the shelf into a blocky wall instead of a clean line, so the panel should stay thin at the root and build weight only toward the end.
13 Hime Cut Without Bangs Ideas
1. The Center-Part Glass Slabs
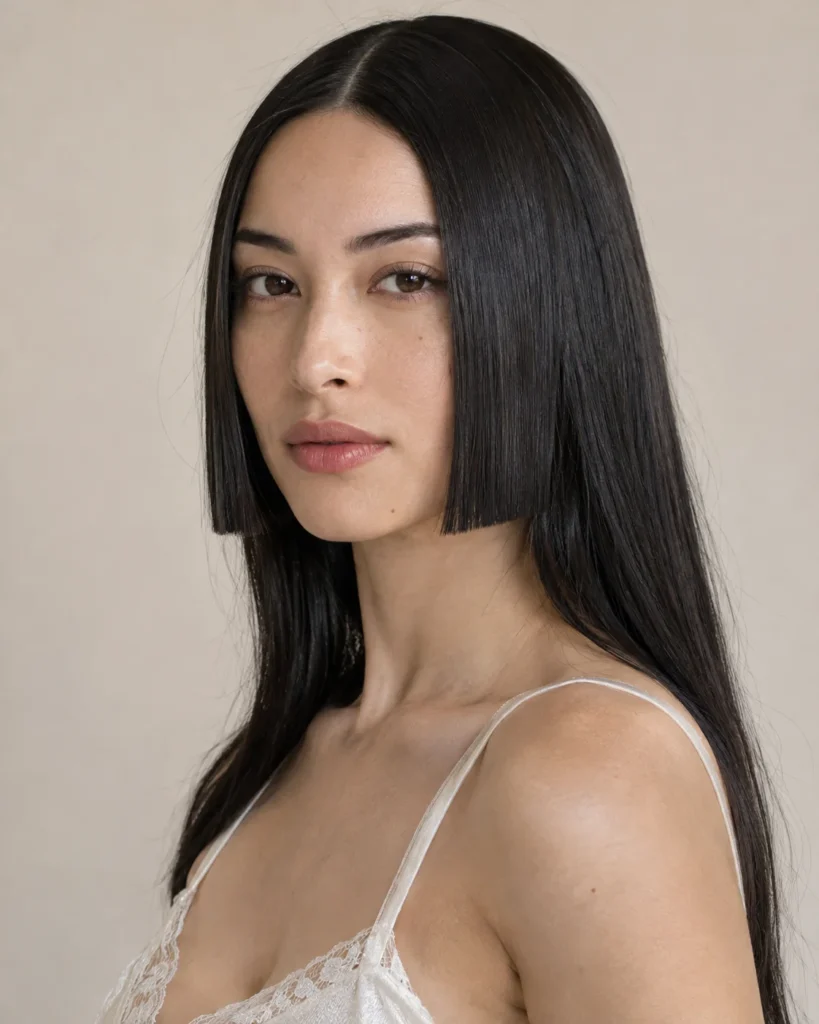
A dead-center part sends the sidelocks down in two identical mirror-shine panels that end in a razor-sharp line at the jaw. Symmetry does all the work here, so a few millimeters of difference between the sides shows instantly.
Stylist secret
Cut both panels with the head tipped forward and the part pinned dead center before a single cut is made. Cutting one side at a time off a shifted part is the most common reason the slabs end up uneven.
- Time: 5 minutes
- Best for: Oval and heart face shapes, straight hair
- Try: A flat iron with a ceramic plate for mirror shine
2. The Soft-Beveled C-Step

The same jaw-level shelf gets its ends curved gently inward instead of cut flat, softening the sharp geometry everywhere else in the cut and keeping strong cheekbones from looking severe.
Stylist secret
Round-brush blow-dry the last inch of each panel inward over a small barrel, then set it with a cool shot. Skipping the cool shot lets the curve relax out within an hour.
- Time: 6 minutes
- Best for: Square face shapes, medium to thick hair
- Try: A small round brush for the inward bevel
3. The Floating Cheekbone Shelf
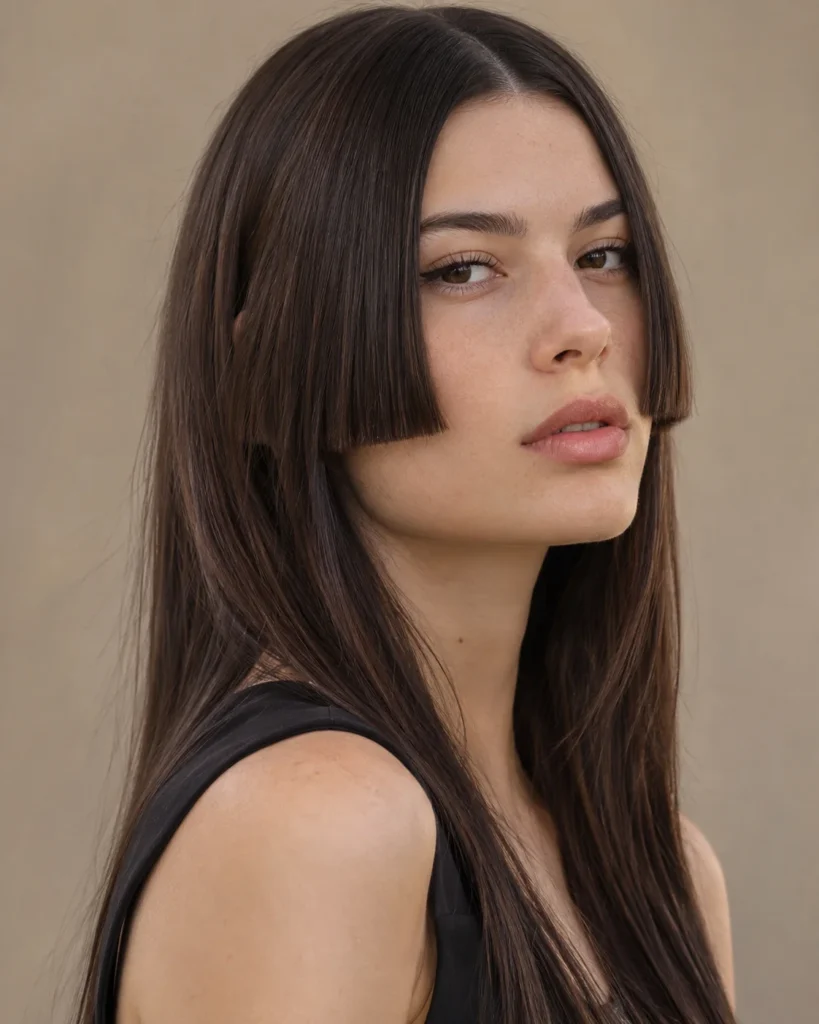
The sidelock shelf sits high, right on the cheekbone itself instead of dropping to the jaw, which widens the appearance of the cheekbones rather than sharpening the jawline the way the lower variations do.
Stylist secret
Measure the shelf height off the cheekbone directly, not off the ear. Ears sit at different heights on almost everyone, and using them as a reference throws the whole shelf off level.
- Time: 4 minutes
- Best for: Long and oval face shapes, fine to medium hair
- Try: A fine-tooth comb for a crisp, precise part
4. The Stealth-Density Ear Tuck
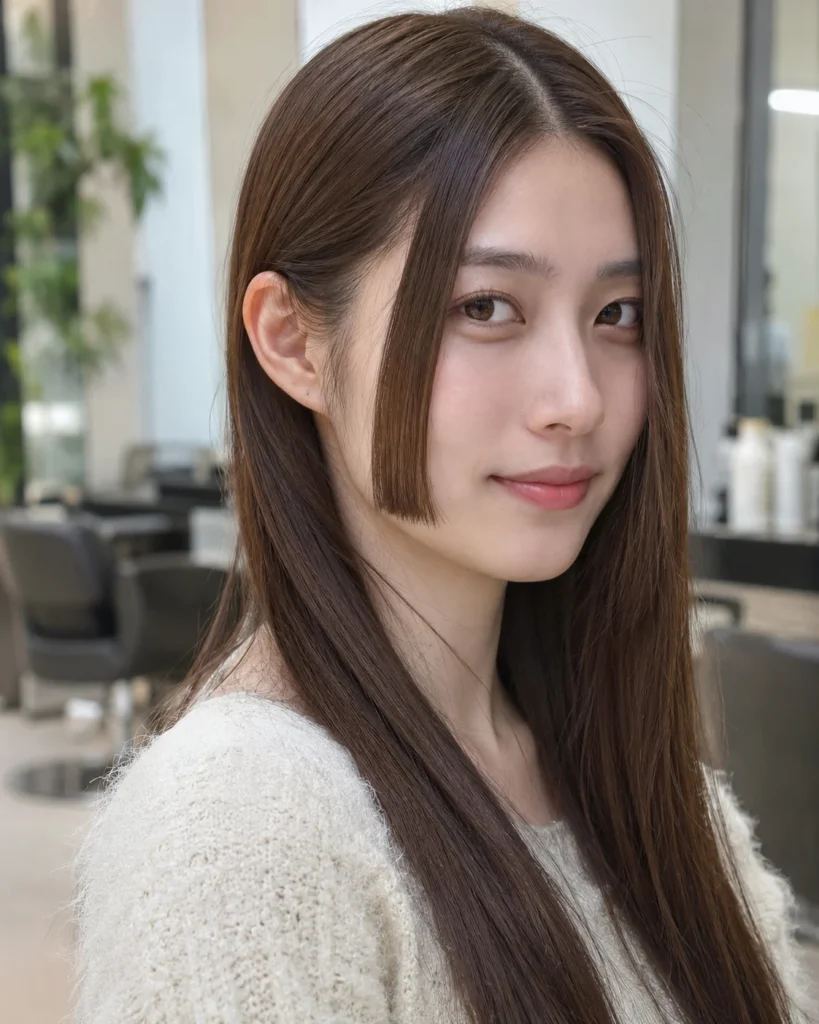
Each side panel is cut slightly thinner right where it passes the ear, so the sidelock can tuck flat behind it for work days without the bulk that makes most versions of this cut spring back out.
Stylist secret
Internally debulk just that narrow section with point-cutting, not thinning shears across the whole panel. Thinning shears there create see-through gaps instead of a clean, flat tuck.
- Time: 3 minutes
- Best for: Any face shape, thick or dense hair
- Try: A flexible-hold hairspray at the ear to lock the tuck
5. The Dual-Tier Sidelock
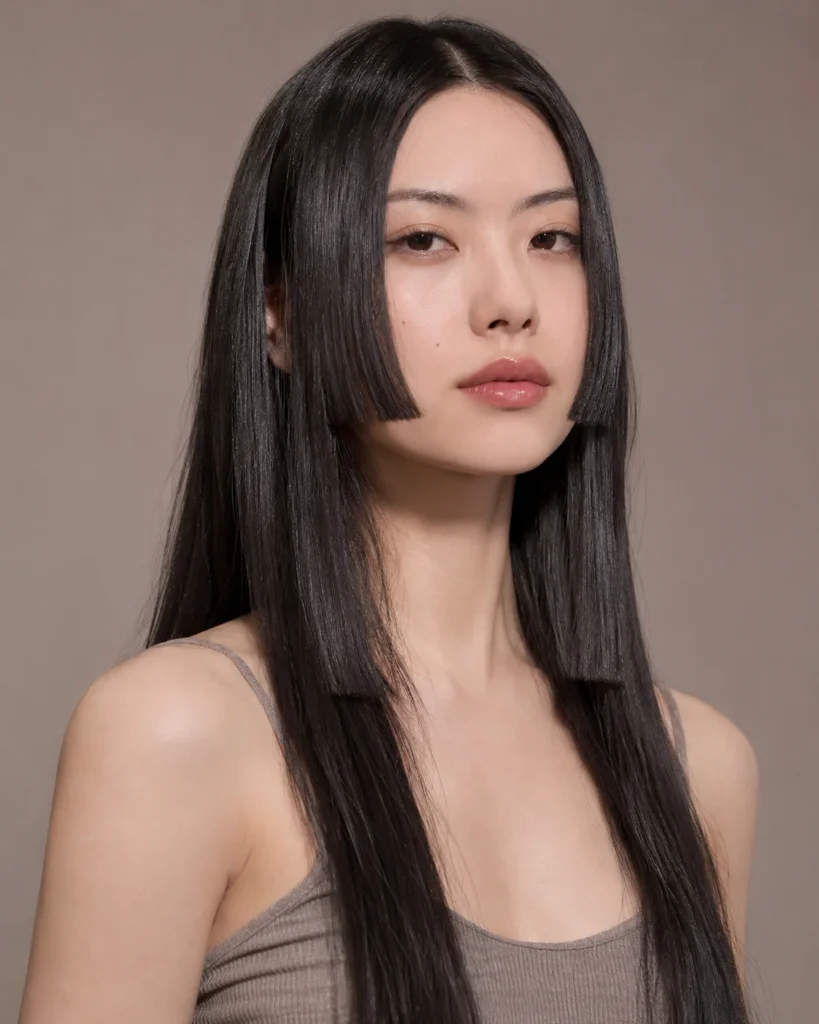
A second, lower shelf drops from the collarbone while the first stays at the lip, so the sidelock reads as two distinct steps instead of one long panel, with zero forehead fringe at any point.
Stylist secret
Cut the upper tier first and let it fully settle before cutting the lower one. Cutting both tiers in one continuous pass almost always leaves the gap between them uneven.
- Time: 6 minutes
- Best for: Diamond and oval face shapes, long thick hair
- Try: Two separate clips to isolate each tier while styling
6. The 90s Silk-Press Hime
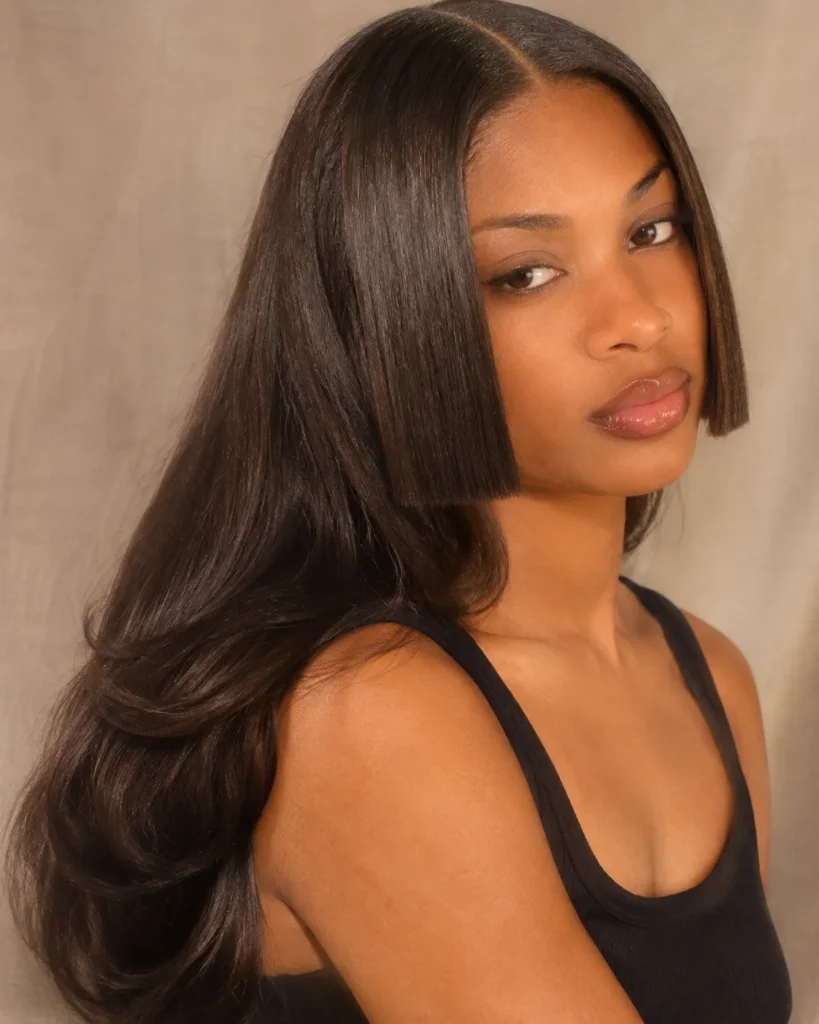
A soft, rounded blowout runs through the body of the hair while the side panels stay flat, square, and untouched by the round brush, keeping the architectural edge even with all that volume elsewhere.
Stylist secret
Blow out the body first with the panels clipped completely out of the way, then flat iron the panels last so round-brush heat never softens their sharp edge.
- Time: 8 minutes
- Best for: Round and oval face shapes, medium to coarse hair
- Try: A boar-bristle round brush for the body blowout
7. The Wavy Textural Contrast
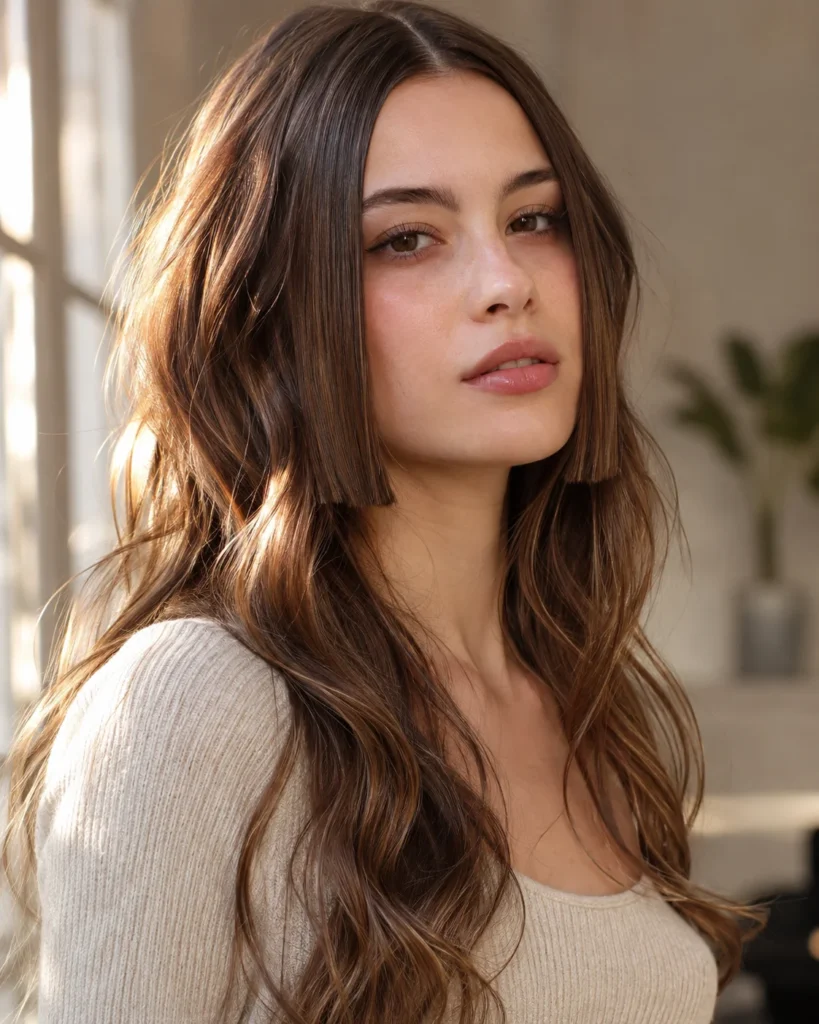
Loose, undone waves move through the back while the front side panels stay pin-straight and blunt, so the contrast between textures becomes the actual focal point instead of the length or color.
Stylist secret
Curl the back sections away from the face on a one-inch barrel, then run a flat iron over the front panels last so no stray wave sneaks into the straight shelf.
- Time: 7 minutes
- Best for: Wavy or textured hair, heart and oval face shapes
- Try: A lightweight texturizing spray on the back waves only
8. The Half-Crown Architectural Pull-Back
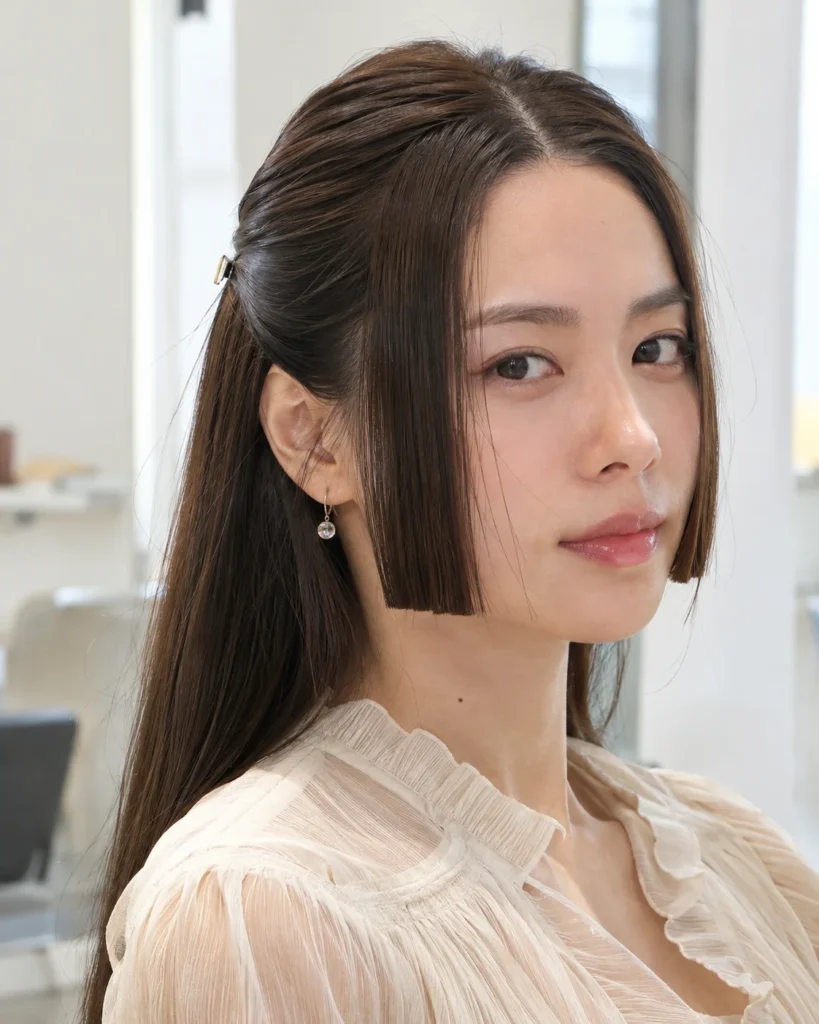
The crown section pulls back clean and flat into a small clip, leaving the forehead completely open and letting the two side slabs do all the face-framing on their own.
Stylist secret
Backcomb only the underside of the crown section before pinning it, never the top layer. A smooth top layer with hidden backcombing underneath keeps this from looking stiff.
- Time: 4 minutes
- Best for: Oval and square face shapes, any hair thickness
- Try: A small flat clip for a seamless pull-back
9. The Under-Slice Color Accent

A thin strip of lighter color sits on the inner side of each jaw-level panel, invisible when the sidelock hangs straight but catching light the moment it moves. These balayage placement ideas use a similar hidden-placement logic.
Stylist secret
Request the lightened section placed no more than half an inch deep from the inner edge of the panel. Any deeper and the accent shows even when the hair is sitting flat.
- Time: 5 minutes
- Best for: Any face shape, hair that holds color well
- Try: A purple-toned shampoo to keep the accent from turning brassy
10. The Collarbone Drop-Step

The sidelocks drop past the jaw all the way to the collarbone, the gentlest, most low-commitment version of this cut for anyone who still wants most of their length.
Stylist secret
Point-cut the very ends of the drop-step rather than a blunt finish. A blunt collarbone-length panel reads heavier and more bob-like than the architectural statement this cut is going for.
- Time: 4 minutes
- Best for: Long-haired minimalists, any face shape
- Try: A lightweight shine serum on the ends only
11. The High Slicked Ponytail with Free Steps
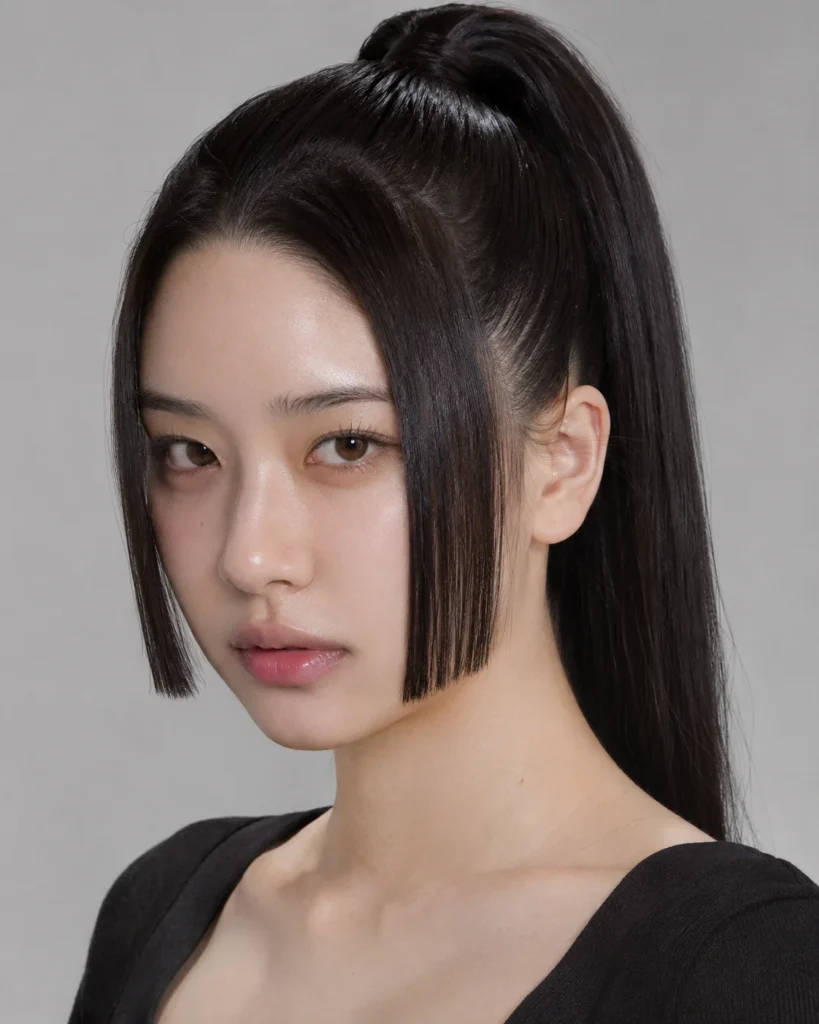
Everything except the two front panels pulls into a snatched, slicked-back ponytail, so only the crisp slabs fall loose and frame the face while the rest of the hair disappears into one clean line.
Stylist secret
Gel the ponytail base flat first, then release the front panels last so they fall over the gelled section instead of getting pulled back accidentally with everything else.
- Time: 5 minutes
- Best for: Oval and heart face shapes, straight to wavy hair
- Try: A strong-hold gel for the slicked base
12. The Micro-Jaw Chin Frame
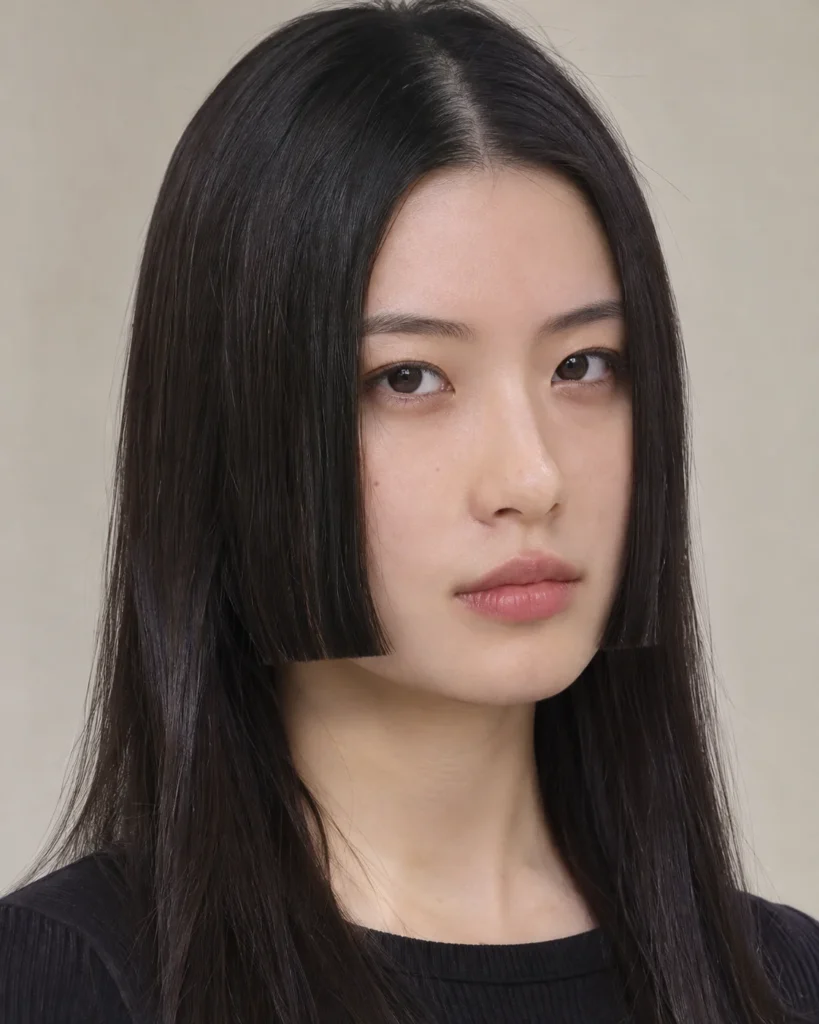
The panel ends exactly parallel to the base of the chin in one razor-flat line, the shortest, most compact version of the sidelock and the one with the least room for error. Our choppy layered shags show a similarly disconnected perimeter at longer lengths.
Stylist secret
Cut this one with zero tension on the hair, letting it hang naturally before the final line is set. Cutting under tension on a line this short causes visible bounce-up once released.
- Time: 3 minutes
- Best for: Oval and diamond face shapes, straight hair
- Try: A fine-mist flat iron pass for a crease-free finish
13. The Wet-Texture Editorial Slick
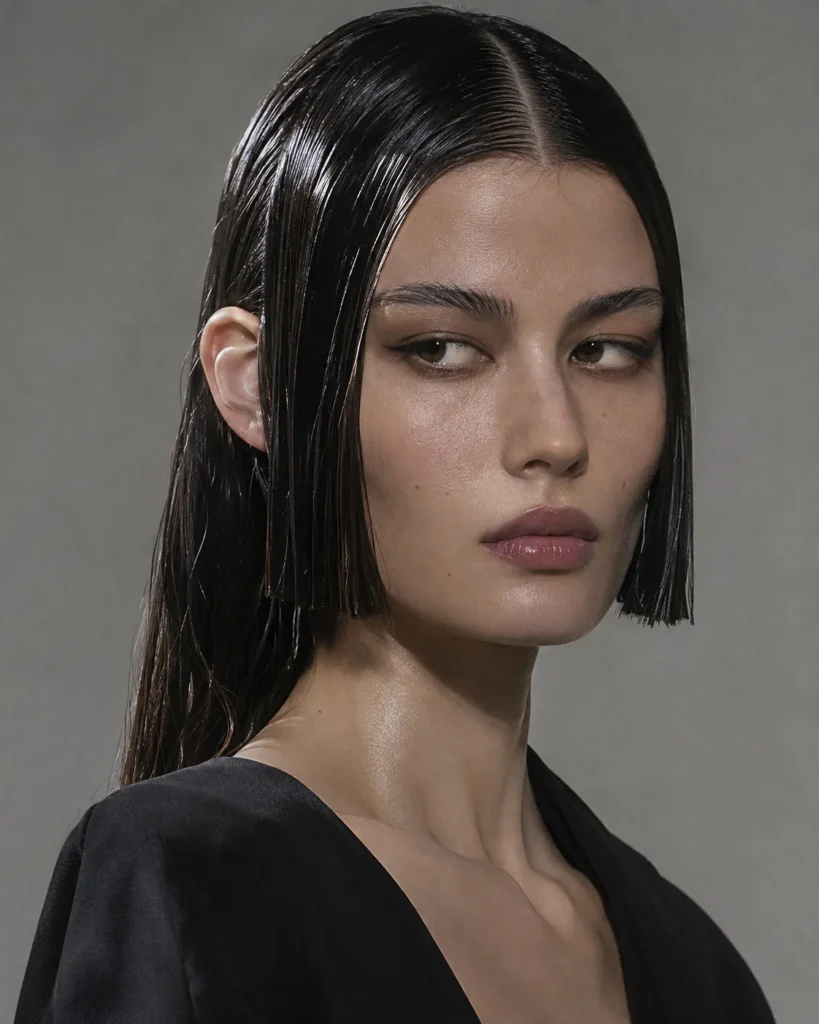
A high-gloss, wet-look gel part replaces any blow-dry entirely, and the disconnected perimeter slabs stay sharp and separated rather than blended into the rest of the head, the most runway-leaning version on this list.
Stylist secret
Apply gel to soaking-wet hair section by section with a fine-tooth comb, sealing each panel before moving to the next. Working the whole head at once lets earlier sections dry unsealed and frizz.
- Time: 6 minutes
- Best for: Any face shape, straight to wavy hair
- Try: A strong-hold, high-shine gel applied wet
Face Mapping and Hair Growth Mechanics
Round and heart faces should keep the sidelock length dropping past the widest point of the cheek rather than cutting straight across it, which draws the eye down instead of out. Square and long faces benefit from soft interior texturizing at the ends, since a completely blunt panel can collide awkwardly with an already-angular jaw corner.
A stubborn cowlick near the center part is the most common reason a sidelock splits or kicks outward instead of lying flat. The fix is cutting that section slightly longer than the rest, so gravity decides the final line instead of the cowlick fighting it every morning.
The Salon Script and Technical Redlines
“I want a hime cut without bangs, with the sidelock shelf cut at jaw level and the rest left completely open at the forehead. Cut it under zero tension so it does not bounce up once released, and do not bevel the ends with texturizing shears.”
Three redlines worth repeating out loud: do not bevel the ends with texturizing shears, since that creates frizz instead of a crisp line. Do not over-direct the hair forward while cutting, which causes an accidental curve instead of a straight panel. And cut under zero tension, so the length does not spring up short once it is released.
Real-World Day-to-Day Maintenance
Flat iron each panel in one slow pass from root to end rather than several short strokes, which is what causes the crease or outward flip that ruins the straight line.
A lightweight finishing oil or styling balm seals frizz without weighing down fine panels the way a heavier serum will, in line with the broader everyday hair care guidance on avoiding product buildup. When the cut grows out, the panels blend easily into curtain layers or face-framing pieces, so retiring this look does not mean starting over from scratch.
Hime Cut Without Bangs: Final Decision Table
| Variation Name | Best Face Shape | Sidelock Cut Level | Restyling Effort |
|---|---|---|---|
| Center-Part Glass Slabs | Oval, Heart | Jaw | 5 min, flat iron |
| Soft-Beveled C-Step | Square | Jaw | 6 min, round brush |
| Floating Cheekbone Shelf | Long, Oval | Cheek | 4 min, comb |
| Stealth-Density Ear Tuck | Any shape | Jaw | 3 min, hairspray |
| Dual-Tier Sidelock | Diamond, Oval | Lip and Collarbone | 6 min, clips |
| 90s Silk-Press Hime | Round, Oval | Jaw | 8 min, round brush |
| Wavy Textural Contrast | Heart, Oval | Jaw | 7 min, curling iron |
| Half-Crown Pull-Back | Oval, Square | Jaw | 4 min, flat clip |
| Under-Slice Color Accent | Any shape | Jaw | 5 min, purple shampoo |
| Collarbone Drop-Step | Any shape | Collarbone | 4 min, shine serum |
| High Slicked Ponytail | Oval, Heart | Jaw | 5 min, strong-hold gel |
| Micro-Jaw Chin Frame | Oval, Diamond | Chin | 3 min, flat iron |
| Wet-Texture Editorial Slick | Any shape | Jaw | 6 min, high-shine gel |
A hime cut without bangs is proof that architecture does not need coverage. Pick the sidelock level that matches your face shape and the amount of daily styling you actually want to do, and bring the salon script above so your stylist sets the line with zero tension the first time.